Welcome to ScapeCrunch

We are ScapeCrunch, the place where planted aquarium hobbyists come to build relationships and support each other. When you're tired of doom scrolling, you've found your home here.

Journal Ryan's 4820 something Journal

Strangely it won't let me upload my other fts here due to it being too large? Think it's a 3.4mb file, I'm not sure what our upload limit is. Just adding on thing I forgot, if anyone's interested in watching a quick 2 minute video, I took one last night to hopefully get some opinions on the flow inside the tank.

It's not a pretty video, I specifically took it to try and focus on a few groups that I'm not sure are receiving too much flow or not. This is almost but not quite as far as I can turn the filters down. I could go lower, a little bit lower, but then I'll have to tweak the injection rate again.

So if anybody checks it out, let me know if you think the flow is too hard or fast! Times like this I'm reminded that I've never seen another hobbyists tank up close and in-person lol, videos and tanks don't do some people's setups justice. Here's the link, just make sure to go into the settings for quality and manually change the quality to 1080p.


And here's the fts I was trying to upload above, had to reduce the file size so the image quality took a huge hit but you get the idea
20230116_211643_reduced.webp
 
I would not say your flow is excessive. Volume wise it is probably fine. Velocity wise, maybe a little high. If you have various drill bits, you could try going 1/64" larger with the holes and re-evaluate the velocity again.
 
I would not say your flow is excessive. Volume wise it is probably fine. Velocity wise, maybe a little high. If you have various drill bits, you could try going 1/64" larger with the holes and re-evaluate the velocity again.
Thanks for weighing in, and thanks for the measurement too. I wouldn't have thought 1/64" would make a difference and would probably have gone much larger but it is across a large number of them so makes sense.

I'm going to get a measurement on the holes and try to go up 1/64 from there; hopefully that helps a little with the same even flow but a little toned down on velocity. I'd like the flow rate on the canisters to be a little higher so maybe go up 1/64 at a time and see how it goes.

Any advice on drilling out PVC? Does material of bit matter, or what type of bit would be best suited for boring them out? I've drilled PVC in the past and it comes out rough/looking terrible. It was to open up the pickup tube on an Oase canister so I wasn't as concerned about looks as I am with this
 
Any drill bit made for metal should work just fine for drilling out plastic/PVC.
And yes, if you are looking at increasing filter output, then I would likely have to increase the hole sizes in increments. Maybe even start out with 1/32" bigger hole.
 
Any drill bit made for metal should work just fine for drilling out plastic/PVC.
And yes, if you are looking at increasing filter output, then I would likely have to increase the hole sizes in increments. Maybe even start out with 1/32" bigger hole.
Thanks for this 💪 I caught your post on Casey's spray bar thread too and I understand why you're called the Mad Scientist lol
 
This one will be heavy on plant pics.

First up, the only things that aren't planted in my tank right now, that I can't wait to get in there, are some super healthy buce sp from @Will Sweigart
20230107_204923.webp
Kishii, Nanga Pinoh, heavy metallica, helena. Just waiting until the last little 0.25ppm of ammonia dies down to get them in there.

Beautiful iguazu from Will also, before and after planting:
20230106_172219.webp20230107_130421.webp

An iguazu I won from @Achi on new year's eve in a violent game of rock paper scissors on the left, next two are healthy erio Setaceum and Macrandra rose from Caleb
20230107_130425.webp20230105_204535.webp20230105_205548.webp20230105_203716.webp


Stauro stolonifera linearifolia from Caleb, hottonia palustris and ah S**t I forget the name of the small carpeting plant up there, they're courtesy of @kokzhilee 🙏 all the syns in this tank are mine (macrocaulon, Manaus) and they don't look so hot either. I left them sit in an old tank about two weeks too long probably. The tall group of cuphea anagalloidea is from @Aaron Dutch II, Aaron planted about half the stems in this tank honestly. I don't have any recent pics of the cuphea but the whole top inch or two is red red now.

Second pic is a more recent shot from the side, plenty of new growth and things bushing out better. Don't mind the tulu, it ships notoriously bad and it's sitting there for now to see how much of it will survive. A good dude was nice enough to help me out by shipping me some asap, my own fault for letting them go in my last tank for too long after I stopped dosing and water changes.
20230106_175535.webp20230116_211426.webp

And of course, just a couple snapshots of the work nobody sees:
20230107_143333.webp20230105_205557.webp

Every stem was prepped and trimmed before planting, every single individual one, and it'll continue that was for as long as I want to preserve the massive amount of landen that went into my sub. Curious what everyone's prep methods are here; for me, I usually have a tote lid like this nearby the tank next to a trashcan, a hand towel to wipe off leaves, and some scissors. I pull any bad leaves off by hand, if they look questionable I might dip the plant in the tank first to get a better look (algae? melt? poor growth? etc)

That part is merciless, anything that doesn't look great goes. Afterwards if they're stems I'll trim them to height into a few different groups depending on how big the group will be and how deep/how heavily staggered. I didn't go too heavy on that part this time around because this is just grow out stage stuff. When I'm finished with that, I take three inches of leaves off the bottom of everything prior to sticking it in the substrate. No sense in having leaves stuck under the sub to melt.

A couple things to note from the planting process:
  • I wanted some aesthetic appeal here so things were still sectioned off in the tank, but not alot of attention paid to placement yet. Nothing is in it's final spot in the tank or even close to it.
  • The reason behind that is I want entirely new growth on everything first, chop off the old growth, and replant before I start moving everything around. I am not a good planner when it comes to layout lol. I have to just constantly move things and physically see infront of me how they look. So right now everything's just hanging out and soaking up nutrients, then they'll get trimmed back a few groups at a time to avoid trimming everything back incredibly heavy in one session (not a great practice, always stagger heavy trims) and then for the most part new growth only will be replanted. I want only growth that's adjusted for what I feed this tank. THEN everything will be allowed to grow out a little more again, and finally after they've beefed up I can start employing some layout stuff.
  • I'm at my limit on reds and would probably like to get rid of a red sp at some point.
  • I would like a rustier brown/orange/yellow to work in somewhere.
  • Final sp count is definitely going to be high, it'll probably stay that way for awhile before I start thinning out.
Some notes on style:
  • I'd like the tank to start trending towards a dutch look within the next say three months; to each their own but Dutch to me is the absolute pinnacle of planted tanking.
  • Do I think I have enough experience with different species yet? Nope.
  • Do I think my husbandry is good enough yet? Also nope.
  • But, getting better at it is one of my main goals in this hobby. The earlier I can start trying to emulate that style the sooner I'll start failing and therefore learning more.
Bonus pics: buce that will wind up in this new setup once ammonia's not detectable on tests. A BG11 that I got towards the end of my collectoritis stage, and the second one is really special. Nanga Silat, haven't found more than one or two others with this yet, and it's easily the most beautiful bucephalandra I've seen. Please know that the lighting in the tank I have it in right now (ADA rgb) is super super green saturated and does it absolutely no justice. In more balanced lighting the inflorescence is jaw-dropping and it almost has a different look every time you walk by the tank :love:
20230107_163750.webp20230106_173509.webp

Special thanks to @GreggZ for his post on being able to resize pics! Helped a lot for this post
 

Attachments

  • 20230107_162153.webp
    20230107_162153.webp
    1 MB · Views: 2
  • 20230107_154956.webp
    20230107_154956.webp
    1.8 MB · Views: 2
  • 20230107_153520.webp
    20230107_153520.webp
    1.3 MB · Views: 2
Dosing for this tank: micros are BurrAqua dosed daily, macros are frontloaded dry, urea is dosed dry daily.

I was originally targeting 21ppm K until Joe recommended I bump it up closer to the 28-30 range. I don't believe I updated my total ppm for S when I upped K, but they're just there for funsies anyway.

Also, if you check the math my macros are targeted to water change volume as opposed to total volume, and micros are targeted to total volume. Urea is a first for me here and is very much a trial by error..mixed opinions on it so far, not sure if I like it or not vs getting N from KNO3 but too early to tell.

75% WC amounts
(18/20:8:30)
Reconstitution:

21:7 (3:1 ratio) - dose for 50gal (75%) water change:
CaSO4.2H2O @ 17.07g (1tbsp + 2tsp + 1/2tsp)
Yield = 21ppm Ca, 16.8ppm S, 2.94 dGH
MgSO4.7H20 @ 13.44g (2tsp + 1/2tsp + 1/8tsp)
Yield = 7ppm Mg, 9.23ppm S, 1.62 dGH
Recon totals: 26.03ppm S, 4.56

PO4: 8ppm
KH2PO4 @ 2.17g (1/4tsp + 1/8tsp)
Yield = 8ppm PO4, 2.61ppm P, 3.29ppm K

K: 21ppm (3:3:1 Ca:K:Mg ratio); 17.71 less KH2PO4
K2SO4 @ 7.47g (1tsp + 1/8tsp + 1/a32tsp)
Yield = 17.71ppm K, 7.26ppm S

K: 30ppm (as per Joe Harvey to match with N better); 27 less KH2PO4
K2SO4 @ 11.39g (1tsp + 1/2 tsp + 1/4tsp + 1/64tsp)
Yield = 27ppm K, 11.07ppm S
Totals - 50gal wc (75% of 65gal dosing volume)
N:
P: 2.61ppm
NO3:
PO4: 8ppm
K: 21ppm
S: 11.82ppm (15.63ppm total if using 30ppm K)

Urea
CO(NH2)2 @ 369mg (1/16tsp + 1/64tsp) to add 0.7ppm N (equivalent to ~3ppm of NO3 daily)
 
And here's where I went far too in-depth with my micro totals just because:

Micros - BurrAqua
2 ML per 10 gallons adds the following ppm:
DTPA - .13
Fe Gluc - .04
Mn - .03
B - .027
Zn - .025
Cu - .0022
Mo - .0011
Ni - .00021
Suggested dose: 2 ML per 10 gallons 3x week, or 1 ML per 10 gal daily.

  • 1ml per 10gal daily adds half of the above ppm amounts (ie, DTPA added from 1ml per 10gal would be 0.065)
  • I'm dosing for 65gal full water column because I'm dosing the whole tank, unlike with macros where I'm only dosing incoming water (75% of 65gal total dosing volume = ~50gal, which is what frontloaded macro math is based off of)

So 6.5ml per 65 gallons dosed daily adds:
DTPA - 0.065
Fe Gluc - 0.02
Mn - 0.015
B - 0.0135
Zn - 0.0125
Cu - 0.0011
Mo - 0.00055
Ni - 0.000105

Total week-ending amounts for daily dosing x7 days:
DTPA - 0.455
Fe Gluc - 0.14 (total combined Fe = 0.596, or ~0.6)
Mn - 0.105
B - 0.0945
Zn - 0.0875
Cu - 0.0077
Mo - 0.00385
Ni - 0.000735
GreggJoe HarveyLinn
Total WeeklyTotal WeeklyTotal Weekly
Based on total water volumeppmppmppmppm
B(H3BO3)
0.10500​
0.07500​
0.09000​
Cu(CuSO4.5H2O)
0.00602​
0.00660​
0.00600​
Fe(DTPA Fe-11%)
0.39997​
0.39000​
0.32500​
FeGluconate
0.20020​
0.12000​
0.19800​
Mn(MnSO4.2H2O)
0.11000​
0.08100​
0.09000​
Mo(Na2MoO4.2H2O)
0.00350​
0.00330​
0.00390​
Ni(NiSO4.6H20)
0.00049​
0.00150​
0.00150​
Zn(ZnSO4.7H2O)
0.07000​
0.06900​
0.08400​

Ryan, just for reference. It seems your weekly totals are pretty close to what the 3 of us are dosing. Maybe a little high on the DTPA, but nothing excessive.
 
Including a quick post on the ph change over the first month of the tank as I didn't see a lot documented anywhere on people having landen buffer quite so low:

From 12/8 (first day of flooding the tank) to 1/1, the ph stayed at 4.6 or 4.7. For the sake of accurate data, all pH measurements are taken using the pinpoint monitor in the tank, double checked with a second pinpoint from another tank, and triple checked with an Apera ph pen (ph60 model maybe? Not home to check at the moment)

Those are in-tank numbers without co2 injection. This is tap in the tank for around 30 days as I was dark cycling and didn't do any water changes during that period.

Between 1/1 to 1/10 it slowly climbed to 5.1, most of these readings are 48hr off gas samples due to me starting co2 injection shortly before initial planting.

Somewhere between 1/10 and yesterday, we finally did it. Off gas sample read 5.6! I'm definitely expecting it to continue to climb, but without njection rate changing at whole this whole time, yesterday's reading confirms that I have at least been hitting a 1.0 drop since starting. No fish show any signs of distress, they don't go near the surface and are plenty active all over the tank during the day.

20230118_164051.webp
 
A large part of why I'm enjoying this setup so much so far is investing in and finishing the water change system before I started putting anything tank related up. I think I've mentioned before that this setup was shamelessly stolen from Dave W and involves 3 44gal trashcans with pool cover pumps (one for draining tank, two for ro).

The ro run off a single product line from the ro unit that's split with two ball valves--I fill one can at a time, close its ball valve and open the other's ball valve, and continue to fill the second can. I have ss Eheim heater in one can that's set to keep the water at 70 F, I fill from that one first and top off maybe a quarter of the tank from the second, unheated can. Each can has its own spectrapure float valve drilled in and haven't had a single issue yet.

When I first got into the hobby these systems seemed so complicated; granted this system doesn't have alot of bells and whistles but it was the easiest thing in the world to set up and an absolute game changer.

Bonus feature, I split the washer lcold water line the ro unit is hooked up to with a y-splitter w ball valve; I have a 25ft garden hose on the other end, in case of deep cleaning sub in the future I can easily have tap running into the tank while I siphon or vac. The hose for this 120p is extendable to reach my 60p one room over, and the 3gal reservoir of ro that I use to feed my small terrariums misting systems.

Pics of water change and refilling ato reservoir
20230103_171419.webp20221230_172522 smaller wc 70.webp20221230_183400.webp

I add one office Dell keyboard to keep startup algae in check
 
Quick update on some things that got interesting today....
I've been noticing a film building up on the surface for about a week and a half (spoiler alert: found out today it is a film of some type of green algae). It looks similar to the buildup that happens if you co2 without any/little surface agitation...really been stumping me since I know that's not the cause, my surface agitation is on point.

Shortly after, about a week ago I noticed algae on the glass. Not sure what type but I didn't pay it any mind. I let it build for some otos to munch on, and was given advice a while ago when facing a similar issue in another tank to sometimes let this type of algae on glass go unless following immediately with a large water change, as spores can actually spread when scraping glass.
20230118_160708.webp20230118_160704.webp20230118_160656.webp

And finally just a few days ago noticed some aquasoil balls greening up from algae. I didn't want to change anything and disturb an already fragile and adjusting ecosystem, but the substrate algae got markedly worse when checking yesterday and today.
20230118_154941.webp20230118_154936.webp

20230118_155905 smaller sub.webp20230118_155908 smaller sub.webp20230118_155912 smaller sub.webp


I then finally noticed that the film on top looks to be the same thing as the sub (assuming the algae on glass is also the same but really no way to tell). I was dumping my dosing cup into the tank and noticed small filaments of algae gathering on the outside of the cup from the film

20230118_160520.webp20230118_160539.webp


As much as I didn't want to introduce any sudden changes, I think we're skipping urea dosing until this saturdays water change, and then continuing with N from KNO3 if necessary. The light setting haven't changed, and the beginning or worsening of the algae seems to coincide with the start of daily urea dosing.

Is it a combo of the urea and high light? Is it just normal start-up algae that will otherwise take care of itself if left well enough alone as the plants continue to adapt and become better suited to nutrient uptake in their new environment? Did I start urea dosing too early in a setup with not enough of a well-established/robust biofilter yet?

I'm not sure, but as much as I'm comfortable with the presence of algae on the glass and have definitely experienced it going away in other setups without intervention as things stabilized, I've never encountered a surface algae film like this, and above all I am extremely uncomfortable with substrate algae...I like my sub clean all the time, and don't like to see anything on the sub spread or worsen. Glad it threw a couple curve balls at me finally, I was beginning to get worried :)
 
GreggJoe HarveyLinn
Total WeeklyTotal WeeklyTotal Weekly
Based on total water volumeppmppmppmppm
B(H3BO3)
0.10500​
0.07500​
0.09000​
Cu(CuSO4.5H2O)
0.00602​
0.00660​
0.00600​
Fe(DTPA Fe-11%)
0.39997​
0.39000​
0.32500​
FeGluconate
0.20020​
0.12000​
0.19800​
Mn(MnSO4.2H2O)
0.11000​
0.08100​
0.09000​
Mo(Na2MoO4.2H2O)
0.00350​
0.00330​
0.00390​
Ni(NiSO4.6H20)
0.00049​
0.00150​
0.00150​
Zn(ZnSO4.7H2O)
0.07000​
0.06900​
0.08400​

Ryan, just for reference. It seems your weekly totals are pretty close to what the 3 of us are dosing. Maybe a little high on the DTPA, but nothing excessive.
Linn thank you, this is *awesome* to have as a reference!

Interesting and semi-related note on this setup: I was talking to @KarateQuat a little last night and this morning and suggested some collaboration on our setups, I didn't know he'd started a journal here. Out of complete chance we started very similar setups at almost exactly the same time, with a couple interesting differences. Joey has high KH source water and different filtration/stocking/plants than I do, but much of the rest is similar. Just think it would be cool to compare notes on some of the different things we both experience in the early days of the tank establishing with the difference in hardness.
 
Current list of species, I believe I got everything. And link to dosing regime sheet


Pogo erectus, Pogo Heidelberg, Pogo downoi helferi red;

Syngo Manaus, syngo macrocaulon, syngo vichada

Samolus parviflorus;

Isoetes sp, aridarum blue;

Rotala tulu, rotala caterpillar, rotala indica, rotala Macrandra rose;

Gratiola viscidula;

Erio Kimberly, erio rat, erio Sulawesi;

Centrolepsis drummondiana;

Crypt pink flamingo;

Acmella repens;

Staurogyne repens, staurogyne stolonifera vichada;

Fenestratum culum;

Cuphea anagalloidea;

Didiplis diandra;

Hottonia palustris;

Lobelia cardinalis, cardinalis mini, cardinalis mini (marble variegated);

Echinodorus iguazu 09;

Anubias nana petite;

Buce: kishii, blue line, nanga pinoh, strong metallica, Helena 2013, Helena

Nanga silat, bg2011

Limnophila hippuridoides mini;
 
Went with a 5/32" bit tonight and bored out all 30 holes on the spray bar tonight (thank you for the help @Immortal1)
20230122_164054.webp20230122_164057.webp20230122_182401.webp
Noticeable difference for sure, helped a lot but still some stuff getting buffeted around. Probably going up across all 30 again tomorrow by another 1/32"; if it's still not the effect I'm looking for after that, maybe add 3 holes to the back angled down as well, evenly spaced across the whole bar.

Looks like I'll need to do some trimming of old growth and more gda leaf scrubbing as well tomorrow, and get some more tests on the water colum to gauge how quick I'm going through nutrients and exactly how much the PO4 adsorption has slowed down.

From the maintenance session the other day to clean up the massive gda bloom (thoroughly enjoyed turning my dining room into a workshop for the day):
20230120_112322.webp20230120_142228.webp20230120_142233.webp
Can't stress enough how important thinking things out is. I redid my entire water change system while I was preparing for this tank and I really put alot into it. I hooked up a 20ft long garden hose with basically a ball valve on the output end; the other end is just screwed into the cold water out from washer hookup (after a y-splitter which also splits to the RO unit's source line)

The thought was, initially flooding the tank to start the dark cycling process would be done with tap. No use making RO for that. More importantly, for heavy maintenance or uprooting sessions, which hopefully are rare because that's alot of upset all at once for anyone's ecosystem, having that hose feed tap into the tank while siphoning out at a roughly equal rate is enormously helpful.

I did this after scraping all the algae off the glass, giving the sub a heavy vacuum, and individually toothbrush scrubbing algae off leaves. It went from 830am until 630pm. I was then able to do what I'm super roughly estimating at a 4-500% water change to clear out all the algae left floating in the water column after scrubbing. The results have been great so far, and today a little is starting to come back. Maybe switching to 2x wc a week to be on the safe side and get the rest of this algae outbreak gone.

My thoughts on what caused the algae bloom in the first place:
Bear with me here. Sure it could absolutely be normal startup stuff. However...
I know (from second hand experience, as this is my first time messing with getting N from urea) that dosing urea is generally best done on a system with a mature biofilter. My guess is that I may have jumped the gun; when my nitrates bottomed out a couple weeks back, I knew I had to start dosing some kind of N. What's the harm, I thought to myself, it's cycled, it'll handle a measly 360mg dose per day.

I'm hypothesizing that jumping the gun on urea dosing was a catalyst for algae already present (as algae always is) to temporarily win the fight for nutrients against my plant mass. But, I have some evidence to lend support to this idea.

I was away for a couple days when the tank got worse with gda (aint that always the way lol) and my brother was keeping me updated with pics. I tested when I got home to confirm my own suspicions: ahh, higher NH4 than when I left. Around 0.5ppm. If you look back on the log of testing I've been doing every couple days, I've sat at 0.25ppm for awhile, and I've had lights and co2 at the same level since the tank was planted, and pretty much had no algae with only very, very minor melt.

So this tells me something may have bumped ammonia up a little bit, possibly urea. Now with the bump up in ammonia came an uncorrelated NO3 reading: 0ppm, or at least an undetectable amount from the test. So what does that tell me? Well, in my mind, that seems like the cycle took a slight bump from raised NH4 suddenly and, being a fragile and new biofilter, stalled out a little bit. Otherwise, I'd have that NH4 being converted into NO3 well within a 24hr period. The absence of that tells me the cycle took a little bump and stalled and floundered a little bit, although it doesn't seem like anything permanent.

How I would love to know if I would've continued algae free if I'd skipped on urea and instead opted to start dosing N from KNO3 instead; but that's not for me to know 🤷‍♂️ the end result is that now I'll be scrubbing gda for a little bit, and my substrate is green. Oh well.
20230121_171127.webp20230122_184329.webp

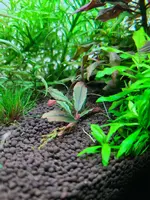
Things looking a lot better with some cleaning :)

If you catch it in that pic, did some bulb rearranging with help from @Burr740 @GreggZ and Ted K, who've all been giving me good feedback on how different brands and spectrums will work together, and lending a critically more experienced eye to things for someone who's running this sort of fixture for the first time. The new combo, front to back:
- Giesemann Superflora
- Giesemann Tropic
- PowerVeg 660nm
- AgroMax 3000K
- PowerVeg 420nm
- Giesemann Purple
In the pic below I have the channel running the Tropic and 3000K turned down about 10% lower than the rest, I upped them a little since then but it's a very subtle difference. I like this rendition alot better than what the previous combo gave me:
20230120_174855.webp

Random notes:
- Hopefully the garra start munching on some substrate algae when they come, you can still see what's on the substrate if you look close enough in this pic and it's pretty brutal.
- S. repens has taken the biggest hit out of all of the plants with the ammonia spike strangely enough
- Switched to KNO3 for N on my last waterchange
- If I'm still doing 2x week or more frequent wc on my tank come tuesday I will have to make sure I'm careful, I killed two otos the other day not thinking about the fact that running from my coldwater tap change >100% meant that my water was going into the tank ice cold, not heated from the RO reservoirs
- I have a syngonanthus sp in here that I got from an unnamed hobbyist without an ID, I've never kept uaupes (sp?) but it looks similar. Same leaf structure as macrocaulon but different plant. There's also a group of erio in there (peeking out behind the bigger iguazu) that I do not know.
- Do alot of these groups look dead and ugly? Yes! But--look at all that new growth!!😍 most noticeable on the tulu tops. Game plan here is to try to push these as far as they'll go as far as new growth that's adjusted to this tank, and then it'll be a vicious session of ripping out old, unadjusted growth, to start everything over as close to 100% adjusted for this tank's parameters.

Coming this Tuesday:
- 4x Herbertaxelrodi (2 pair)
- 4x M. Boesemani (2 pair)
- 4x M. Trifasciata 'Goyder River' (mixed sex)
- 4x M. Mairasi, finally
- 3x Garra flavatra
 

Attachments

  • 20230120_112131.webp
    20230120_112131.webp
    203.2 KB · Views: 2
Thanks for this advice. Not gonna lie, it's been so long since I set up the 60p that I kind of forgot what I based the volume and math for dosing on. I've been running the other two tanks long enough that I just pretty much have a baseline that I know works so I go off that. I also went and grabbed a couple decent check valves from your recommendation, didn't spring for the Dennerle but got some UNS ones...I love my UNS tank, I hate all their equipment, but the check valves looked sturdy enough. I think they're the murlock/push to connect style fittings.

Speaking of dosing volume, I was playing around with a good spot to start at and decided for a tank that's bigger than what I'm used to I'll probably just measure out dry and dump them in at least for macros. Easier at this point than messing w a solution, I grabbed some 1000ml bottles and even with those I run into the solubility issues with K. I frontload on the other two tanks anyway and will on this one, just as easy to grab a teaspoon every week.

Not much going else going on right now except trying to get organized before tank delivery day on thursday. ATO reservoir came and looks nice, got that reactor assembled and ready to go, and I'll be switching out the nice reg from my 90L tomorrow after work. 20# is gassed up and ready to go. Only thing giving me anxiety right now is waiting on those reducers to be delivered, it's been surprisingly difficult to find one that fits to go down from 19/25 to 16/22 that actually fits both hoses snug and isn't brass or copper 😂 check valve on the reactor in the pics is gonna get swapped out when those push to fit ones come in with the rest of my 16/22mm hose
View attachment 561View attachment 562View attachment 560
Hi Ryan,
how much co2 drop you get with this reactor?
 
Hi Ryan,
how much co2 drop you get with this reactor?
Hmm I'm not sure, I didn't run it for too long. There's a post up above that goes over the CO2 drop details but short version is this:

Landen buffers to such an extent that my in tank pH before injection was around 4.6 or 4.7. with a baseline that low, you're not going to be able to measure a drop. I switched reactors, and eventually the landen started to chill out a little. I'm hitting at least a 1 point drop now with a different, rex griggs style reactor, and most likely hitting much over 1 point too, just won't know for sure until the every-other-day off gas test results cease going up (last one was 5.6)
 
Correct but yeah, extra wire and connector I can definitely send!
First off, what an epic build thread! Just had a chance to read through the whole thing, and the level of documentation you're providing is like a research methods journal, lol. I'm looking forward to watching this develop.

This exchange between you and @Immortal1 caught my eye. Did you ever figure this out so that you can implement his (bad ass) hanging system? In case not, the wires anchored to each end of the fixture casing have a ball on one end but a removable end stop on the other, similar but not identical to that pictured below. You should be able to remove the end stop, thread the cable through a new cable gripper, and put the end stop back on. Or in the event that your cables do have fused balls at either end, you can just snip one off, thread, and then replace with an end stop.
s-l500.jpg
 
First off, what an epic build thread! Just had a chance to read through the whole thing, and the level of documentation you're providing is like a research methods journal, lol. I'm looking forward to watching this develop.
Thank you very much man I appreciate that 🙏 I'm long overdue for an update here for sure, work's just been taking up about 70 hours of my weeks and right now just keeping up with the maintenance is all I can do

As for the conversation about the light, yeah they're fused balls on either end. What holds the cable in place if threading through an end stop?
I've included a picture of the actual ATI hanging kit to hopefully give a clearer idea. The end stops are the two components at the bottom of the picture. Each end stop has two screws. You thread the cable into the end stop and tighten the two screws to secure the end stop to the cable. At that point, the end stop performs the same function as the fused metal ball. Only difference is it's removable so you are able to thread and unthread the cable through other hardware as needed.

12957.jpg
 

Top 10 Trending Threads

Back
Top