Welcome to ScapeCrunch

We are ScapeCrunch, the place where planted aquarium hobbyists come to build relationships and support each other. When you're tired of doom scrolling, you've found your home here.

New 90 P (90 x 50 x 50) tank setup

Excited to see how your filter turns out. My recommendation would be to have nothing upstream/ prior to your DC pump, and to arrange filtration after the pump. It would be a pain to prime otherwise.
But you also have to consider how all the filtration after the pump effects head pressure and the pump's resulting performance. Even a 90 elbow is like adding a foot of head height, so I imagine pushing water through even a single filter is far more than that. Would be interesting to experiment with the pump on both ends and measure flow. I'm about to do a flow test on my next tank because I'm debating what filtration setup to use. Maybe I'll try to test this out.
 
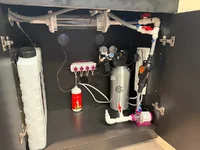
I understand both points and appreciate the input. I’m thinking of keeping the pump as stated, but adding a tee just before the pump with a “prime” valve to allow me to open the line just before the pump and fill the input stream with water. May never need to use it but just in case.
 
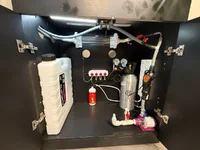
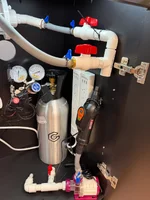
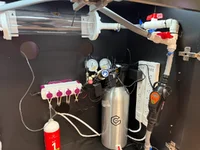
And then flex hose from pump to inline heater, flex hose from heater to tee, flex hose from perpendicular output of tee to return Lily pipe #1. Then flex hose from straight output of tee to horizontal reactor, short hose to regulator valve, then flex hose to return Lily pipe #2. Sound right?
 
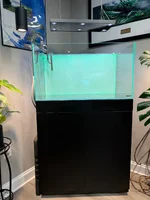
I’ve attached a photo of my stand/tank in its current state. I have the two netlea units and another Jebao pump running on a cycled tank in another room. I did most of this this evening and would add clamps on hoses if I decided to go with it.

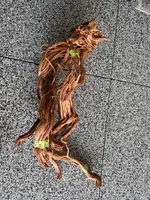
I have two large pieces of red azalea wood soaking for a couple weeks and am probably two weeks away from adding hardscape & substrate and dark start.

Please let me know what you think particularly of the “plumbing”.
 

Attachments

  • IMG_0358.webp
    IMG_0358.webp
    576.8 KB · Views: 60
  • IMG_0365.webp
    IMG_0365.webp
    97.4 KB · Views: 33
  • IMG_0366.webp
    IMG_0366.webp
    105.7 KB · Views: 32
Another iteration. This is what I plan to go with. I wonder what this plumbing will look like in 6 months? I’ll let the driftwood soak for two weeks total, have my daughter’s wedding and then start scaping!
 

Attachments

  • IMG_0373.webp
    IMG_0373.webp
    80.7 KB · Views: 15
  • IMG_0374.webp
    IMG_0374.webp
    71.7 KB · Views: 18
  • IMG_0376.webp
    IMG_0376.webp
    102.7 KB · Views: 24
Well….. as I started to play around with putting hardscape into the new tank I realized the total height was too high to put my arm over comfortably by about 4”. I should have checked this out beforehand. I looked at modifying the stand but contacted ARC who is having a 90 x 50 x 40 tank built. Only downside is the wait. Probably early December. Plan has been to do two of these, so I’ll build the second stand 4” shorter and use the existing tank there. I’ve enjoyed the adventure of building my own stand, and plan to build two more, but if I wasn’t willing to do all that I believe I’d buy the Miotke stand and tank from seven ports.
 
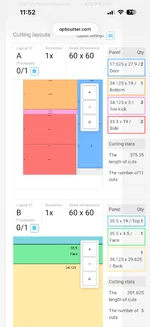
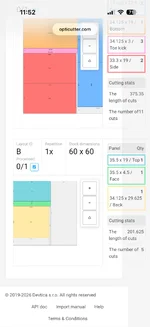
How do you like the Opticutter app? As a short person, with a 2' tall tank, I like the idea of making the stand a little shorter. Between you and Rocco, and wanting to slowly get the gallery set up in the basement, I am getting very motivated to replace the table saw, biscuit cutter, belt sanders, and cabinet clamps I lost in the fire.
 
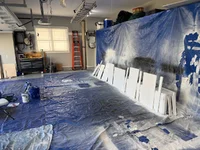
I used it as a “guest” and liked it very much. I’d use it again for sure. I also enjoyed learning the new skills to cut, assemble and finish the stand. Only limitation I’m up against right now is that I spray paint in my garage and the paint says temp needs to be a minimum of 55 degF, so I need to get this next one done quickly. Main tools I used were track saw, pocket hole jig, hinge jig, finishing sander, paint sprayer. I’ll build a 48” when weather allows next year.
 
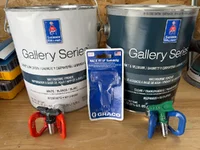
I purchased the Graco sprayer for the first aquarium stand and loved it. I plan to use it on things beyond the stands going forward. There was and still remains a serious learning curve but the ability to apply paint evenly in even the most difficult of geometries, and the resulting finish is unmatched. I wish I had bought something like this 30 years ago.
 
Last edited:
Back
Top