
Welcome to ScapeCrunch
We are ScapeCrunch, the place where planted aquarium hobbyists come to build relationships and support each other. When you're tired of doom scrolling, you've found your home here.
Social Feed

Journal The 75 Garden
Hi all, while I have had accounts for a variety of forums, I believe this will be my first ever post to any forum, anywhere. I've been exclusively a Facebook hobbyist for years and some of you may know me from there. I assume I can have more than one build thread, I have two tanks, so I'd like to keep separate threads for each. I'll be figuring out the quirks and limitations of forum posting along the way.
I am very much on the cheap end of the hobby, so my 75 (the largest tank I've ever owned) is a basic Aqueon tank from Petco's 50% sale. The stand is made from construction lumber. I'm active in the woodworking hobby as well, though I haven't finished my workbench yet, hopefully this summer...
I used the standard 2x4 design, and I'm never doing it again. 2x4 frames are an extremely inefficient way to utilize the materials and space. Sheet goods are superior, and the cost differences aren't significant. For more information, you'll have to wait for my 10 gallon build thread.
To anyone that is going to make a 2x4 stand (or any DIY stand, tbh), I have two main bits of advice:


I used hardboard facing and paint for a simple finish. The doors were the most difficult bit. At the last minute I decided to inset a bit of plywood for a back, rather than leaving it open, and I'm happy with the decision. It protects the whole stand against racking forces and provides locations for mounting auxiliary equipment.


I applied a black privacy film background, since fish expand their chromatophores in darker environments, resulting in more vivid coloration. I also like the contrast.

Filtration: two canister filters, a SunSun 370 GPH and an Oase Biomaster Thermo 600 (350 GPH) for a total nominal hourly turnover rate of 9.6.
Filter Fittings: Aquario Neo with venturi skimmers, shrimp guards, and lily-type outputs.
CO₂: Two reactors, one on each output, run from a GLA Pro-DS-2 regulator, 5 lb cylinder. I have a flowmeter and pH controller that I'll be installing this summer.
Substrate: Master Soil Next, Powder, Black
Light: Chihiros WRGB II (OG)
This tank was replacing a 16 gallon tank that I had built from a bit of acrylic I had been given. I went ahead and transferred the plants and fish and prepared for the ammonia spike.


The Pogostemon helferi var. 'Downoi' melted to nothing, but there were no other casualties. The ammonia spike came quickly, but my tap water has 0 dKH, so it naturally sits around 6.8. The substrate buffered it further down to 6.0, and with CO₂, down to 5.0. The temperature in the tank is 76°F (24°C). At that temperature and pH, ammonia is extremely non-toxic, it's almost entirely unionized ammonium. Ionized free ammonia tolerance varies by species, but starts to be of concern at about 0.02 mg/L. At 24°C, and 5.0 and 6.0, the Total Ammonia Nitrogen (TAN) reading necessary to yeild 0.02 mg/L of free ammonia is 375 and 40 mg/L, respectively.
So, I didn't worry about the ammonia. I did no water changes, I just let it do its thing, and I lost no fish. The stocking at the time included Sundadanio goblinus, Microdevario kubotai, (two species that are generally considered "sensitive") and an alien Betta.

It took much longer than I had expected for the tank to process the ammonia. I had used the filter media from the 16 gallon predecessor, so I thought it would be over in a week. I hadn't counted on how much phosphate my substrate would devour. I finally set up my auto-doser and mixed salts, and suddenly, my fish were all gasping at the surface. I was confused, I had added lids at the same time and I thought that the lids were blocking the oxygenation of the water. I fiddled with it for a day or two and then tested my water. I finally had nitrites.
I started my foray into the aquarium hobby in Utah in 2012. In all those years, cycling a tank had been simple, though unforgiving. 7.8 pH, 18 dGH, 15 dKH, 350-450 TDS, it was liquid rock. Nitrifiers never experienced nutrient deficiencies and grew rapidly, but ammonia was very toxic, so any little bump in the cycle and fish died. I moved to North Carolina in November of 2020.
Here, the TDS of the tap water is 37. The only thing in our water is the calcium hydroxide (slaked lime) that the water company adds to prevent plumbing corrosion. The pH straight out of the tap is typically 9.5-ish, but it offgasses to 6.8 within 24 hours sitting out, and within seconds of being added to an active tank full of humic, tannic, nitric, and carbonic acids. When the hydroxide offgasses, all that's left is a bit of calcium. I haven't been able to nail down the exact reason, but the API GH test overestimates my hardness significantly. I have good reason to believe that my GH is about 1.5 dGH (all calcium, no magnesium) but the API test always returns 5 dGH. My current running theory is that the API test measures the calcium only (this is actually quite common among GH tests) and then assumes a "normal/average" ratio of calcium and magnesium (1 part calcium to 2 parts magnesium) and therefore can overstate the GH by a factor of 3 if no magnesium is present.
Anyways, that was a bit of a tangent. When I came to North Carolina, I discovered that nitrifiers frequently experience nutrient deficiencies in this incredibly pure water. In particular, phosphate deficiencies. In every tank previously in NC, a bit of fertilizer was all it took, but this was my first experience with an aquasoil devouring my phosphates. It wasn't until my autodoser was adding KH₂PO₄ on a daily basis that my cycle finally got unstuck.
Nitrite poisoning and CO₂ poisoning act the same way, both of them bypass the selective uptake channels and pumps within the gills. They ower the pH of the blood, converting oxygen-carrying hemoglobin into non-oxygen-carrying met-hemoglobin— a condition called methemoglobinemia. It's the same reason benzocaine products like Orajel are no longer approved for use with teething pain in infants, as it can also cause methemoglobinemia (blue-baby syndrome). The Root Effect in fish functions a bit differently than the Bohr Effect in most vertebrates, and again it functions differently in invertebrates that posses cyanoglobin as opposed to hemoglobin.
Anyways, the point is that nitrite poisoning and CO₂ poisoning are additive. So I just turned the CO₂ down for a few days, added some Prime, and watched the fish. I turned it back up once the nitrite portion of the cycle passed, a little less than a week.
And so this was the rather humble start of my 75 gallon journey. I'll try to be less long-winded in my next post bringing it up to its current state.
I am very much on the cheap end of the hobby, so my 75 (the largest tank I've ever owned) is a basic Aqueon tank from Petco's 50% sale. The stand is made from construction lumber. I'm active in the woodworking hobby as well, though I haven't finished my workbench yet, hopefully this summer...
I used the standard 2x4 design, and I'm never doing it again. 2x4 frames are an extremely inefficient way to utilize the materials and space. Sheet goods are superior, and the cost differences aren't significant. For more information, you'll have to wait for my 10 gallon build thread.
To anyone that is going to make a 2x4 stand (or any DIY stand, tbh), I have two main bits of advice:
- Use glue. Modern wood glue is stronger than the wood itself. Applying glue to each mating surfaces does more for the strength of the stand than all of the hardware combined. I always viewed glue as being somehow inferior in years past but a quality wood glue is amazing stuff.
- If you use glue for each surface, and you use good joinery (or faux-joinery, in the case of the corners) to transfer the weight of the tank to the floor without hanging on anything, then you can build the whole thing out of 1x4 and be fine. Go look at commercial stands, whether they be Oase, Waterbox, Petco, whatever, they all use 1x4s and sheet goods. 2x4s are pointless.
I used hardboard facing and paint for a simple finish. The doors were the most difficult bit. At the last minute I decided to inset a bit of plywood for a back, rather than leaving it open, and I'm happy with the decision. It protects the whole stand against racking forces and provides locations for mounting auxiliary equipment.
I applied a black privacy film background, since fish expand their chromatophores in darker environments, resulting in more vivid coloration. I also like the contrast.
Filtration: two canister filters, a SunSun 370 GPH and an Oase Biomaster Thermo 600 (350 GPH) for a total nominal hourly turnover rate of 9.6.
Filter Fittings: Aquario Neo with venturi skimmers, shrimp guards, and lily-type outputs.
CO₂: Two reactors, one on each output, run from a GLA Pro-DS-2 regulator, 5 lb cylinder. I have a flowmeter and pH controller that I'll be installing this summer.
Substrate: Master Soil Next, Powder, Black
Light: Chihiros WRGB II (OG)
This tank was replacing a 16 gallon tank that I had built from a bit of acrylic I had been given. I went ahead and transferred the plants and fish and prepared for the ammonia spike.
The Pogostemon helferi var. 'Downoi' melted to nothing, but there were no other casualties. The ammonia spike came quickly, but my tap water has 0 dKH, so it naturally sits around 6.8. The substrate buffered it further down to 6.0, and with CO₂, down to 5.0. The temperature in the tank is 76°F (24°C). At that temperature and pH, ammonia is extremely non-toxic, it's almost entirely unionized ammonium. Ionized free ammonia tolerance varies by species, but starts to be of concern at about 0.02 mg/L. At 24°C, and 5.0 and 6.0, the Total Ammonia Nitrogen (TAN) reading necessary to yeild 0.02 mg/L of free ammonia is 375 and 40 mg/L, respectively.
So, I didn't worry about the ammonia. I did no water changes, I just let it do its thing, and I lost no fish. The stocking at the time included Sundadanio goblinus, Microdevario kubotai, (two species that are generally considered "sensitive") and an alien Betta.
It took much longer than I had expected for the tank to process the ammonia. I had used the filter media from the 16 gallon predecessor, so I thought it would be over in a week. I hadn't counted on how much phosphate my substrate would devour. I finally set up my auto-doser and mixed salts, and suddenly, my fish were all gasping at the surface. I was confused, I had added lids at the same time and I thought that the lids were blocking the oxygenation of the water. I fiddled with it for a day or two and then tested my water. I finally had nitrites.
I started my foray into the aquarium hobby in Utah in 2012. In all those years, cycling a tank had been simple, though unforgiving. 7.8 pH, 18 dGH, 15 dKH, 350-450 TDS, it was liquid rock. Nitrifiers never experienced nutrient deficiencies and grew rapidly, but ammonia was very toxic, so any little bump in the cycle and fish died. I moved to North Carolina in November of 2020.
Here, the TDS of the tap water is 37. The only thing in our water is the calcium hydroxide (slaked lime) that the water company adds to prevent plumbing corrosion. The pH straight out of the tap is typically 9.5-ish, but it offgasses to 6.8 within 24 hours sitting out, and within seconds of being added to an active tank full of humic, tannic, nitric, and carbonic acids. When the hydroxide offgasses, all that's left is a bit of calcium. I haven't been able to nail down the exact reason, but the API GH test overestimates my hardness significantly. I have good reason to believe that my GH is about 1.5 dGH (all calcium, no magnesium) but the API test always returns 5 dGH. My current running theory is that the API test measures the calcium only (this is actually quite common among GH tests) and then assumes a "normal/average" ratio of calcium and magnesium (1 part calcium to 2 parts magnesium) and therefore can overstate the GH by a factor of 3 if no magnesium is present.
Anyways, that was a bit of a tangent. When I came to North Carolina, I discovered that nitrifiers frequently experience nutrient deficiencies in this incredibly pure water. In particular, phosphate deficiencies. In every tank previously in NC, a bit of fertilizer was all it took, but this was my first experience with an aquasoil devouring my phosphates. It wasn't until my autodoser was adding KH₂PO₄ on a daily basis that my cycle finally got unstuck.
Nitrite poisoning and CO₂ poisoning act the same way, both of them bypass the selective uptake channels and pumps within the gills. They ower the pH of the blood, converting oxygen-carrying hemoglobin into non-oxygen-carrying met-hemoglobin— a condition called methemoglobinemia. It's the same reason benzocaine products like Orajel are no longer approved for use with teething pain in infants, as it can also cause methemoglobinemia (blue-baby syndrome). The Root Effect in fish functions a bit differently than the Bohr Effect in most vertebrates, and again it functions differently in invertebrates that posses cyanoglobin as opposed to hemoglobin.
Anyways, the point is that nitrite poisoning and CO₂ poisoning are additive. So I just turned the CO₂ down for a few days, added some Prime, and watched the fish. I turned it back up once the nitrite portion of the cycle passed, a little less than a week.
And so this was the rather humble start of my 75 gallon journey. I'll try to be less long-winded in my next post bringing it up to its current state.

4 Replies
·
1772 views


Supporting
I Donated 2026
Rockstar
With all the talk on Amazonia pro, I wanted to get some basic understanding of rich aquasoil.
- everyone seems to agree that the richer the aquasoil is, the more the amount of water changes you would have to do initially. Basically meaning that aquasoil leaches its contents into the water and you replace the water. Now….. doesn’t that just mean that you are throwing away what you paid for ? Even if one does a dark start, and minimize the number of water changes one still has to do a water change after the dark start and still end up wasting the nitrate/phosphate?
—— trying to ask then does that mean the only person who benefits from a super rich aquasoil is someone like an insta or YouTube person who wants a quick burst of growth with the initial leaching of nutrition. For everyone else wanting a stable long term system, a not so rich aquasoil which might help the plants a little bit in the beginning but being used more for long term stability and buffering capacity?
- do the plants actually get the boost initially from the root zone or is it more from the leaching that happens and ultimately from the WC? The later makes sense since their roots have not yet developed.
- if one has the whole substrate inside a container with water, wouldn’t water touch all aspects of the substrate regardless of it being capped or not ? How does capping a aquasoil actually help? Green aqua stated that ada recommends capping the Amazonia pro with Amazonia 2.
Curious on people’s thoughts on this.
- everyone seems to agree that the richer the aquasoil is, the more the amount of water changes you would have to do initially. Basically meaning that aquasoil leaches its contents into the water and you replace the water. Now….. doesn’t that just mean that you are throwing away what you paid for ? Even if one does a dark start, and minimize the number of water changes one still has to do a water change after the dark start and still end up wasting the nitrate/phosphate?
—— trying to ask then does that mean the only person who benefits from a super rich aquasoil is someone like an insta or YouTube person who wants a quick burst of growth with the initial leaching of nutrition. For everyone else wanting a stable long term system, a not so rich aquasoil which might help the plants a little bit in the beginning but being used more for long term stability and buffering capacity?
- do the plants actually get the boost initially from the root zone or is it more from the leaching that happens and ultimately from the WC? The later makes sense since their roots have not yet developed.
- if one has the whole substrate inside a container with water, wouldn’t water touch all aspects of the substrate regardless of it being capped or not ? How does capping a aquasoil actually help? Green aqua stated that ada recommends capping the Amazonia pro with Amazonia 2.
Curious on people’s thoughts on this.
1 Replies
·
22 views

Supporting
I Donated 2026
Rockstar
Journal Kwyet’s 60G Hillstream Tank
Sometime in Nov 2024, I bought a 60G Aqueon tank at the 50% off sale. I already had a 75 gallon stand and tank, but I wanted a shorter tank so I could look in over the top. The 75 gallon was relegated to the garage in case I want it again, and I painted the stand black. I also put black vinyl on the back.
My goal was to make a hillstream environment, based on the long-running tank of Rachel O’Leary. I had looked at other options like the river manifolds, but I liked Rachel’s better. I set it up with an fx6 filter, a horizontal spray bar on the left side, and 2nd modified spray bar situated vertically behind a corner Matten filter on the back right side. Glass strips were attached with silicone to hold it. I cut the Matten filter horizontally a few inches from the tank floor so the top part could be easily removed for cleaning. I also cut a small vertical groove from the inside so it wouldn’t constrict the holes so much on the curve.
This was how it looked on Dec 20, 2024:

My goal was to make a hillstream environment, based on the long-running tank of Rachel O’Leary. I had looked at other options like the river manifolds, but I liked Rachel’s better. I set it up with an fx6 filter, a horizontal spray bar on the left side, and 2nd modified spray bar situated vertically behind a corner Matten filter on the back right side. Glass strips were attached with silicone to hold it. I cut the Matten filter horizontally a few inches from the tank floor so the top part could be easily removed for cleaning. I also cut a small vertical groove from the inside so it wouldn’t constrict the holes so much on the curve.
This was how it looked on Dec 20, 2024:
50 Replies
·
6036 views

Hey all,
Just wondering what your thoughts or experiences are with running some form of moon or dusk lighting.
With my tank only running 8hrs of light per day, I have recently added a 2-3% setting on my Chihiros WRGB II from 18:00 - 21:00.
It's running quite a blue light and is just so that I can still get some enjoyment from my fish when I am at home in the evening.
Does anyone else do this in planted tanks? Do you think it will create algae issues?
Cheers
Chimera
Just wondering what your thoughts or experiences are with running some form of moon or dusk lighting.
With my tank only running 8hrs of light per day, I have recently added a 2-3% setting on my Chihiros WRGB II from 18:00 - 21:00.
It's running quite a blue light and is just so that I can still get some enjoyment from my fish when I am at home in the evening.
Does anyone else do this in planted tanks? Do you think it will create algae issues?
Cheers
Chimera
2 Replies
·
47 views

Supporting
I Donated 2026
Rockstar
Article Contributor

I've really been digging pearlweed in my low tech tank, and thinking of growing a shaped pearlweed bush in my high tech experiment tank.
But I came across this listing for a white/platinum variety of pearlweed. Can't find any info on it anywhere. So I ordered 5 stems, the most expensive pearlweed stems on earth!
Think it'll actually survive/be platinum or light colored?
We really need some lighter colored plants in this hobby. Myrio 'Golden' is one I've successfully used, but it grows too crazy and the trimmings drove me nuts so I ditched it. What other white/platinum plants are there?
13 Replies
·
868 views

Staff member
I Donated 2026
Founding Member
Hello Welcome, c.guzman91
Welcome to ScapeCrunch, @c.guzman91!
We would love to get to know you. Please tell us about yourself. What tank do you have?
We would love to get to know you. Please tell us about yourself. What tank do you have?
0 Replies
·
8 views
Staff member
I Donated 2026
Founding Member
Hello Welcome, X-Aquatixs
Welcome to ScapeCrunch, @X-Aquatixs!
We would love to get to know you. Please tell us about yourself. What tank do you have?
We would love to get to know you. Please tell us about yourself. What tank do you have?
0 Replies
·
12 views

Hey guys, needing some expert insight on my 90P build regarding the Yugang reactor. I’d like a sanity check on sizing.
System
What I measured

View attachment y2.mp4
System
- Display: 90 × 45 cm outside, 10 mm glass, so ~88 × 43 cm inside (~3,780 cm²), rimless, lidless.
- Sump: 20-gallon long (76 × 30 cm, ~2,280 cm²), 3 chambers, loose lid.
- About 220 L total water.
- Return enters below the surface; no deliberate surface agitation.
- BeanAnimal overflow, with the main draining underwater (no cascade).
- Currently cycling on tap water: KH 13, GH 12. The plan is RO remineralised to KH 3–4.
- Horizontal Yugang, 3" Sch40 PVC (ID 77.9 mm), 46 cm long.
- Outlet rotated to near the limit of what my plumbing allows, so the pocket is much smaller than half-full.
- CO₂ flow meter at about 9 mL/min. That’s slightly over what it dissolves, so it gives small occasional burps.
What I measured
- Plateau: pH 6.80 at KH 13 ~ 60 ppm (pH/KH estimate). Degassed baseline pH at 8.2.
- Overnight decay after CO₂ off: k ≈ 0.12/h (half-life ~5.7 h). That implies a CO₂ exchange rate of ~4–7 cm/h, i.e. a calm surface.
- Working the 1/17.7 rule backwards from my reactor area (~180–358 cm² depending on rotation), my effective loss area is ~1,100–2,200 cm², against ~6,060 cm² of real water surface (display + sump).
View attachment y2.mp4
22 Replies
·
407 views

Journal Farmer D. Singh's journal
Ive reorganized the order of my tanks so I can better keep track of them ie. Tank 2 moss tank is now tank 3. This helps in any confusion I had when tracking tanks they are in a sort of order now. Rather than taking time editing my old journal id rather create a new thread. Pics will be current (for the most part) as they are posted. I am not aquascaping. I am just farming.
85 Replies
·
5369 views
Staff member
I Donated 2026
Founding Member
Well, as this thread exists in a few places, I figured why not have it here also. Perhaps we can take up the baton and keep it active and bring some value to hobbyists.
For those of you that don't know, I got into thinking much more about my micros when I read this thread on another forum. It was started by our very own @GreggZ. It was spurred into existence because of our own @Burr740 and his work with micro fertilizers. Some really good discussion followed and a lot was learned.
I don't want to steal Gregg's thunder with this so I hope he posts his current thoughts on the subject and we can all take it from there.
All the best,
Art
For those of you that don't know, I got into thinking much more about my micros when I read this thread on another forum. It was started by our very own @GreggZ. It was spurred into existence because of our own @Burr740 and his work with micro fertilizers. Some really good discussion followed and a lot was learned.
I don't want to steal Gregg's thunder with this so I hope he posts his current thoughts on the subject and we can all take it from there.
All the best,
Art
100 Replies
·
16765 views

I feel i need to do a journal so I have a internet calendar on what's happened or Ill forget lol! This is now 4 months back into the planted tank world and I'm happy to be back yet lost on true aquascapingI I have a current 29g as a farm tank for future builds going. zrdr 4l co2 bought locally full setup for 40.00, 29g free. A 20long I just bought with metal stand, hygger decent new led light.new heater. few foam bubble filters, ar a nice dual air pump. some new stratum about 16lbs , tons of good food, etc etc and 6 live plants crypts, swords, anubis about 30 stems of rotundifolia 12" tall for 85,00 it was a decent deal with what is came with , I thought!
Original plans was a 29 and 20 long. Well 3 weeks forward to 3 days ago picked up a free 36 bow front with stand, foods.heater, some dragon stone, bubbler all working freeby deal of the year for sure! The tanks pretty clean, some light hard water stains lll razor blade off very clean. Did come with about 35lbs stratum and blk rocks mix.
I threw substrate in tank after light rinse. LOL it went to pitch blk even after 2 big filters with filter floss still blk water after 36 hours later its muck now the stratum is crap imo other than deeper substrate to cover up with build. I have no clue on any age of the stratum 2 months or 5 years no info was free on side of road literally. I decided today to dump the stratum its a dam mess! may strain the stratum with my several size buckets to strain out small materials away from the blk gravel and use it with eco!? Just got 2 20lb bags of eco complete for 55 shipped my 2005 go to, easy no breakdown and same cost as bulk gravel from pet stores in the end.
I Would do the blk blasting sand its cheaper but don't want all sand and in end as I still do some gravel clean monthly oops.. The eco complete last imo forever I have 20 year old eco now in tank. Yeah its inert but still whole rocks. I"Ill be posting many pics of the my dry scapes holy hell! And more as it goes. Its been 19 years since I've done a planted tank def not a newbie just don't remember as much as I did and things have changed any help appreciated for sure! Joe burr has been help sure thanks dutchscape god!
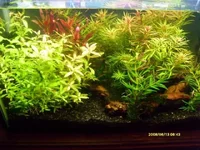
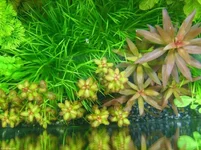
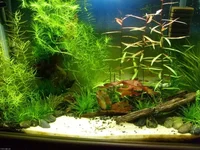
Posted few pics of old tanks 19 years ago when I didn't know what an aquascape was lol no co2 just dry ferts, metride 14 and power compacts it worked! algae was very null. Im calling my new tanks the cheap skape 20 and now 36g the freebie. I usually try to go cheapo as I can get Im not rich rather spend 30.00 on steaks at home than 30.00 on stems lol. I'm mr diy I only buy what I cant build usually.
Original plans was a 29 and 20 long. Well 3 weeks forward to 3 days ago picked up a free 36 bow front with stand, foods.heater, some dragon stone, bubbler all working freeby deal of the year for sure! The tanks pretty clean, some light hard water stains lll razor blade off very clean. Did come with about 35lbs stratum and blk rocks mix.
I threw substrate in tank after light rinse. LOL it went to pitch blk even after 2 big filters with filter floss still blk water after 36 hours later its muck now the stratum is crap imo other than deeper substrate to cover up with build. I have no clue on any age of the stratum 2 months or 5 years no info was free on side of road literally. I decided today to dump the stratum its a dam mess! may strain the stratum with my several size buckets to strain out small materials away from the blk gravel and use it with eco!? Just got 2 20lb bags of eco complete for 55 shipped my 2005 go to, easy no breakdown and same cost as bulk gravel from pet stores in the end.
I Would do the blk blasting sand its cheaper but don't want all sand and in end as I still do some gravel clean monthly oops.. The eco complete last imo forever I have 20 year old eco now in tank. Yeah its inert but still whole rocks. I"Ill be posting many pics of the my dry scapes holy hell! And more as it goes. Its been 19 years since I've done a planted tank def not a newbie just don't remember as much as I did and things have changed any help appreciated for sure! Joe burr has been help sure thanks dutchscape god!
Posted few pics of old tanks 19 years ago when I didn't know what an aquascape was lol no co2 just dry ferts, metride 14 and power compacts it worked! algae was very null. Im calling my new tanks the cheap skape 20 and now 36g the freebie. I usually try to go cheapo as I can get Im not rich rather spend 30.00 on steaks at home than 30.00 on stems lol. I'm mr diy I only buy what I cant build usually.


20 Replies
·
1434 views
