
Welcome to ScapeCrunch
We are ScapeCrunch, the place where planted aquarium hobbyists come to build relationships and support each other. When you're tired of doom scrolling, you've found your home here.
Social Feed

Staff member
I Donated 2026
Founding Member
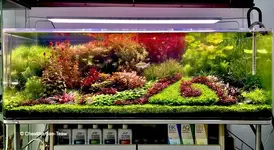
Tank of the Month December 2022 Tank of the Month - The Garden by Chaettha Sae-Teaw

Tank Title name : The Garden
Introduction
Hi – my name is Cheattha Sae-Teaw and I go by Anthony Zhang in English. I'm Thai-Chinese, born in Phuket, Thailand.
I worked in China for 25 years. Now, I’m living in my home town, Phuket island, which is the world's finest beach destination. I love to travel around the world and am fascinated with nature, culture, art and music. I have many hobbies such as collecting paintings, art work, gemstones, jade carvings and, of course, my favorite hobby is aquatic plant tanks.

System Profile
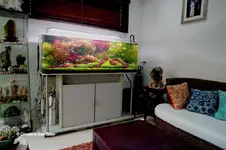
- Display tank : Azoo 450 L (150 x 60 x50 cm) (119 US gallons)
- Glass or acrylic : Acrylic
- Stand : Azoo cabinet aquarium stand set
- Sump? None
- Filter : Canister : Crazy Stone CS-1400 1 set (1400 L/Hour) (370 US gal/Hour)
- CO2 : Pressurized CO2 with Chihiros regulator and diffuser
- Water circulation : SUNSUN Aquarium surface skimmer SKU074 (3W) - 300L/hour (80 US gal/hour) and SONIC AP-600 (4W)-350L/hour (92 US gal/hour)
- Lighting : Chihiros WRGB I (120 cm 1 set).
- Dosing :
- Fertilizers : Daily dosing Ferka Balance-N, Ferka Balance-K, Ferka Aquatilizers and TARA Ferric+
- Hormones and Bacterial : Weekly dosing TARA Biostimulants, Biological Growth, Biological Brightening, Biological Magical
- Auto top off : None
- Heating/cooling : Chiller Heilea 90A setting at 25C (77F)
- System control : None
Water circulation and flow summary and objectives
SUNSUN Aquarium surface skimmer SKU074 (3W) - 300L/hour on the middle of right side with left direction same direction with Crazy Stone CS-1400 water Filter, and SONIC AP-600 (4W)-350L/hour on the left side back top corner with forward direction to circulated the water and spread out the CO2 bubbles
Water parameters
- Temp : 25C (77F)
- pH : Not measuring
- NO3 : Not measuring
- PO4 : Not measuring
- Fe : Not measuring
- Tap or RO/RODI : Natural well water
- Do you remineralize? : None
What do you dose your tank and how? Fertilizer objectives
- Daily dosing Ferka Balance-N to put the Nitrogen to perform the superior condition for aquatic plants and prevent the leaves from nitrogen deficiency.
- Daily dosing Ferka Balance-K to put the Potassium to perform the superior condition for aquatic plants and prevent the leaves from withering due to potassium deficiencies.
- Daily dosing Ferka Aquatilizers to put the Magnesium, Sulpher and trace elements to promote aquatic plants to flourish and remain healthy.
and Daily dosing TARA Ferric+ to put the Ferric chelate to support the development of rich and vibrant plants coloration
- Weekly dosing TARA Biostimulants to put the plants Hormones (Auxin, Cytokinin organic potassium, etc.) to speed up the plant’s metabolism, vigorous growth and accelerates the symbiotic between substrate soil microorganism and plants
- Weekly dosing Biological Growth to put the Amino acid polypeptides, vitamins, minerals, active plant Auxin compound and probiotic to decomposed the organic matter, hydrogen sulfide and promote the root growth
- Weekly dosing Biological Brightening to put the Amino acid polypeptides, Trace elements, vitamins, minerals, active plant Auxin compound and probiotic to decomposed the organic matter, promote healthy stem and leaves and promote the plants color
- Weekly dosing Biological Magical to put the live bacteria, pathogenic solitary bacteria, essential photosynthetic bacteria for water environment improvement
- Adding by used the product dispenser pump bottle and measuring and pouring with volume measuring cup
Note : Ferka and TARA is a brand of Best quality aquarium product from Thailand, and Biological is one of most famous aquarium product brand from China

Substrate
Crazy Stone Amazon Soil + Raw Base (The substrate have been used 3+years old )
Note : Crazy Stone is a famous aquarium product brand from China and Raw Base is a popular aquarium product from Thailand
Aquascaping style objective?
For this Tank the aquascaping style I named it 'The Garden' and this tank layout is divided the main garden into 3 areas :
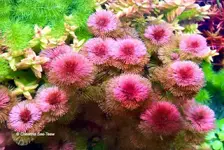
- The First part of garden is 'The formal' which inspired by formal garden in the Palace of Versailles. This part is on the middle-right side of tank and it's the most difficult to maintain, the green lines, shapes and patterns of Pearl Weed (Hermianthus micranthemoides) need to trimmed every 3 days to maintain the shape
- The Second part of garden is 'The Keukenhof' which inspired by the Keukenhof garden in Netherland, this part garden located on the middle-left side of tank that I intended to make the garden look beautiful and colorful both from top view and front view, by the technique of Classic Dutch style I make the street of plants with contrast of colors and textures
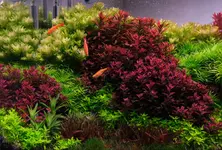
- The Third part of garden is 'The Tropical' it's on the left side, right side and whole back tank with tropical garden style that including the different sizes, shapes, colors and textures of aquatic plants to perform the natural look as tropical forest

Lighting summary and objectives
Chihiros WRGB I (120 cm 1 set). lighting 11 hours per day (6.30 - 17.30) with Full mode (100% in all colors), 30 min ramp up and down
Filtration objectives
Water circulation and filtering out some organic waste and decomposed

Maintenance routine and export strategy
1. Daily : clean up the surface skimmer, sieving out the falling and floating leaves, adding fertilizers and feeding fish
2. Weekly : trimming some plants, clean up the tank wall, change the water 30-40% offand adding plants hormones and bacteria
3. Monthly : trimming and replanted some plants, and giving root fertilizer tablets for Cryptocoryne and Nymphaea plants
4. Quarterly : remove and replanted the carpet plants, or re-scaping the layout
Tank inhabitants - fish
1. Phenacogrammus interruptus 'Congo Tetra"
2. Melanotaenia boesemani 'Boeseman's rainbow fish'
3. Trichopodus leerii 'Pearl gourami' short body
4. Hyphessobrycon herbertaxelrodi 'Black neon tetra'
5. Hemigrammus rodwayi 'Gold tetra'
6. Aphyocharax rathbuni 'Green fire tetra'
7. Xiphophorus macalatus 'Golden moon platy'
8. Macrotocinclus affinis 'Drawf sucking fish'
9. Carinotetraodon travancoricus 'Dwarf puffer fish'


Tank inhabitants - inverts
Neocaridina denticulata
Tank inhabitants - plants
1. Bacopa colorata
2. Lobelia cardinalis ‘Drawf’
3. Ludwegia sphaerocarpa ‘pilosa’
4. Cabomba Furcata ‘piauhyensis’
5. Lidwegia sp. Mini super red
6. Pogostemon erectus
7.Rotala macrandra green
8. Eriocaulon Vietnam
9. Rotala colorata
10. Myriophyllum sp. Guyana
11. Cyperus helferi
12. Hermianthus micranthemoides ‘Pearl Weed'
13. Heteranthera zosterifolia ‘Stargrass’
14. Limnophila hippuridoides
15.Alteranthera Reineckii ‘Rosanervig’
16.Cryptocoryne wendtii ‘Flamingo’
17. Cryptocoryne wendtii ‘Mini brown’
18 .Hyptis lorentziana
19. Blyxa japonica
20. Micranthemum tweediei “Monte Carlo”
21. Juncus repens
22. Bucephalandra sp. ‘Metallica’
23. Nymphaea oxypetala

How did you decide what to keep in your tank?
I selected aquatic plants and animals based on their natural compatibility that will survive and be healthy in my tank’s conditions. And design the plant's layout based on their unique characteristics.
Any stocking regrets?
No
What do you love most about this hobby?
Feeling focus and concentrated when I do the tank maintenance, and feeling happy, relaxed and peaceful when watching the tank
What’s your dream tank?
In this Present : Dutch aqauscaping layout with colorful and healthy aquatic plants
In the Future : My own style aquacaping layout that is unique, stands out and is recognizable and styled in 360L Ultraclear glass tank, steel loft cabinet stand with Chihiros WRGB Pro Light
What was your biggest challenge with this tank and how did you get past it?
The big challenge is the formal garden maintenance which requires concentration and skill in trimming so I meditate before trimming

What is the most valuable piece of equipment for this tank?
Light and Chiller equipments
Any future plans for this tank?
January 2023 change new substrate and The Classic Dutch style will be the first layout of this new setup tank for learning the traditional rules of real Dutch style, and the second layout will transform it to Modern Dutch style or colorful Formal garden tank

Any special tips for success or advice you’d like to share with other hobbyists?
-Plant Hormones are my secret items to enrichment the aquatic plants health
-Bacteria are important factors in the existence and balance of biological system in planted aquarium, find the right bacteria product for your tank and used it now
-Fertilizer is a basic factors that needs to be understood to used in right proportions, learn to use it properly
-Observe and learn the possibilities of nature in ecosystem of your tank, it's a key to success

Any closing thoughts or comments?
I hope my tank will give you some useful information
Finally, thank you and wish you all a Merry Christmas and Happy New Year!


23 Replies
·
7525 views


I Donated 2026
Expert in Residence
MOTM Winner
Rockstar
I have always liked Rotala florida as plant due to its strongly colored leaves, but realized that I haven't actually aquascaped much with it - meaning to integrate it as part of a layout and not just growing a bunch of it in farm/collector style tank. Using plants in a layout in tighter bunches, and in competition with surrounding plants/hardscape is much harder than growing it farm style in a single patch - it also means be able to shape/trim the bushes to match the overall curves of the layout.
Back in 2016 or so when I first received Rotala florida samples from north america, I could only grow it in sparser bunches. It looked nice in macro photographs but I could not envision using it an bush that would show off well as part of a layout unless I can grow it much denser. In the recent years, there were two main discoveries that I found in my experimentation, the first is that it grows better in moderate GH (5 dGH+) compared to super soft water (say <3dGH), and that it grew better in certain soil mixes (I experimented with different garden soil mixes when engineering the composition of APT Feast). Eventually I integrated some of the soil data into APT Feast's composition, and paired with the higher power lights readily available today, I find that I could finally grow the plant the way I envisioned as part of overall layout. I could prune it dense, as the base stems were healthy enough to sprout dense side shoots after trimming - and the secondary/tertiary shoot tips were as fully colored and sized similar to a primary shoot tip that hasn't been subjected to topping yet.
As a midground stem, it works very well due to its slower growth rate vs other colored stem plants.
Against the deep purple of Rotala florida, I found that Golden white clouds worked quite well. So now they are the main inhabitants of the tank.
Tank this week (25/6/2025)


Tank started out like this:

A week or 2 after initial planting (5/5/2025). I reused old aquasoil from the previous scape, so I planted all plants up front rather than waiting more time for the tank to stabilize, with the idea that I could out-grow any algae issues. Initially wanted to add H. Chai but it really didn't fit the overall color scheme, and the bushes by the side were too invasive to be compatible with having a chai patch I think.
Since it was going to contain Rotala florida, I thought I might as well throw in other high demand troublesome species such as the Red Eriocaulon quinguangulare, blood vomit. I settled on Rotala tulunadensis for the background as I wanted something dense and shapeable.
Tank specs:
60x36x36cm
Filter: Oase biomaster 250, all sponge media
CO2 injected through inline atomizer
Substrate: APT Feast
Water column: APT Sky to raise GH to 5dGH, 2ml of APTe per day.

Light distance. Interestingly, not crazy high PAR - just around 200-250 umols PAR at the substrate level.

Trimming and shaping: Most bushes were shaped by cutting individual outlier shoots one by one. Only Rotala blood red and the Rotala tulunadensis was straight trimmed across the entire top once.

This is how the Rotala tulunadensis looked like after a straight trim on 29/5/2025. About 3 weeks from when the top picture at top of this page was taken. It took the plant a whole week + to show new shoots. It seems straight trimming slows down the plant quite a bit, but allows for a very dense & neat canopy afterwards.

There are some interesting plants stuffed here and there. Some Eriocaulon caulescens? bolivia? that local hobbyists passed on to me. Carved out a patch for Syngonanthus vichada - slow grower, but the couple of babies that came have doubled in size so I think they should be alright. I think I will move them to a larger tank with more space.


Only discovered the color combination with the Golden white clouds when the tank matured, but its one of my favourite fish-plant combinations now. I think that while some of the species are a bit picky about growth conditions, one thing I really like about this tank is that most things have moderate/slow growth rates, which makes maintenance with regards to removing excess growth less tedious.
Elatine triandra is used as a low growing green filler plant - it does this role well. As it does not root very deeply, I can easily cut and pull off excess growth easily. Its the fasting growing plant in the layout that requires frequent removal of excess growth.
Some more close-ups.


I'm trying to replicate concepts of this layout (slowing growing bushes) into my 4ft tank.
Back in 2016 or so when I first received Rotala florida samples from north america, I could only grow it in sparser bunches. It looked nice in macro photographs but I could not envision using it an bush that would show off well as part of a layout unless I can grow it much denser. In the recent years, there were two main discoveries that I found in my experimentation, the first is that it grows better in moderate GH (5 dGH+) compared to super soft water (say <3dGH), and that it grew better in certain soil mixes (I experimented with different garden soil mixes when engineering the composition of APT Feast). Eventually I integrated some of the soil data into APT Feast's composition, and paired with the higher power lights readily available today, I find that I could finally grow the plant the way I envisioned as part of overall layout. I could prune it dense, as the base stems were healthy enough to sprout dense side shoots after trimming - and the secondary/tertiary shoot tips were as fully colored and sized similar to a primary shoot tip that hasn't been subjected to topping yet.
As a midground stem, it works very well due to its slower growth rate vs other colored stem plants.
Against the deep purple of Rotala florida, I found that Golden white clouds worked quite well. So now they are the main inhabitants of the tank.
Tank this week (25/6/2025)
Tank started out like this:
A week or 2 after initial planting (5/5/2025). I reused old aquasoil from the previous scape, so I planted all plants up front rather than waiting more time for the tank to stabilize, with the idea that I could out-grow any algae issues. Initially wanted to add H. Chai but it really didn't fit the overall color scheme, and the bushes by the side were too invasive to be compatible with having a chai patch I think.
Since it was going to contain Rotala florida, I thought I might as well throw in other high demand troublesome species such as the Red Eriocaulon quinguangulare, blood vomit. I settled on Rotala tulunadensis for the background as I wanted something dense and shapeable.
Tank specs:
60x36x36cm
Filter: Oase biomaster 250, all sponge media
CO2 injected through inline atomizer
Substrate: APT Feast
Water column: APT Sky to raise GH to 5dGH, 2ml of APTe per day.
Light distance. Interestingly, not crazy high PAR - just around 200-250 umols PAR at the substrate level.
Trimming and shaping: Most bushes were shaped by cutting individual outlier shoots one by one. Only Rotala blood red and the Rotala tulunadensis was straight trimmed across the entire top once.
This is how the Rotala tulunadensis looked like after a straight trim on 29/5/2025. About 3 weeks from when the top picture at top of this page was taken. It took the plant a whole week + to show new shoots. It seems straight trimming slows down the plant quite a bit, but allows for a very dense & neat canopy afterwards.
There are some interesting plants stuffed here and there. Some Eriocaulon caulescens? bolivia? that local hobbyists passed on to me. Carved out a patch for Syngonanthus vichada - slow grower, but the couple of babies that came have doubled in size so I think they should be alright. I think I will move them to a larger tank with more space.
Only discovered the color combination with the Golden white clouds when the tank matured, but its one of my favourite fish-plant combinations now. I think that while some of the species are a bit picky about growth conditions, one thing I really like about this tank is that most things have moderate/slow growth rates, which makes maintenance with regards to removing excess growth less tedious.
Elatine triandra is used as a low growing green filler plant - it does this role well. As it does not root very deeply, I can easily cut and pull off excess growth easily. Its the fasting growing plant in the layout that requires frequent removal of excess growth.
Some more close-ups.
I'm trying to replicate concepts of this layout (slowing growing bushes) into my 4ft tank.
252 Replies
·
40031 views


Journal High-Tech 90P Build
Hi guys!
I'm new here, but not entirely new to planted tanks though I've been out of the hobby for the better part of the last decade between kids and moving a couple of times - but finally in a spot where I can do something again. I'm mostly going to be making things up as I go along, but plan on a lot of automation (I want to integrate everything into home assistant) and a lot of DIY as I love the challenge of building things out myself.
The starting point:
I picked up a 90P rimless, low-iron tank on a great deal.
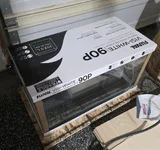
I have a rough idea in my head for a stand to be built from plywood - just have a couple other house projects to finish off before starting that built.
Wife says I can only have one aquarium, so for this tank, I want to go all out with a sump to allow for auto top off, and auto water changes, auto fertilizer dosing etc. etc. I have half a plan in my mind.
I've also started on the light fixture which I've modeled up in CAD, and plan on making out of an 8020 extrusion, and some 3D printed bits.
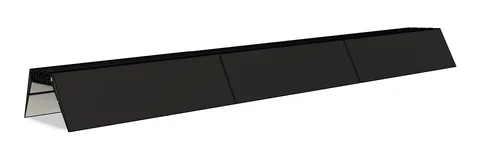
I'm using bridgelux gen 3 thrive CW (3000k) and WW (5000k) LED strips which have super high CRI at 98+ along with some specific XPE2 wavelengths that I'll solder onto some starboards. Far Red (730nm), Red (654nm), Cyan (495nm), Blue (455nm), Visible UV (415nm). Each segment of the white channels will be on its own driver so I can adjust left to right brightness in thirds, and each colour channel on its own driver so I can vary each channel on a time-based approach.
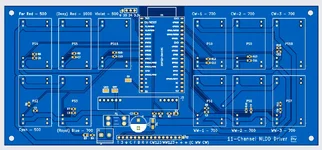
These will be run from a custom PCB board with Meanwell N-LDD drivers, and will run ESPHome on an ESP32 so it can link up with my Home Assistant installation.
That's it for now, this will probably be a very slow build so be warned if you follow along!
I'm new here, but not entirely new to planted tanks though I've been out of the hobby for the better part of the last decade between kids and moving a couple of times - but finally in a spot where I can do something again. I'm mostly going to be making things up as I go along, but plan on a lot of automation (I want to integrate everything into home assistant) and a lot of DIY as I love the challenge of building things out myself.
The starting point:
I picked up a 90P rimless, low-iron tank on a great deal.
I have a rough idea in my head for a stand to be built from plywood - just have a couple other house projects to finish off before starting that built.
Wife says I can only have one aquarium, so for this tank, I want to go all out with a sump to allow for auto top off, and auto water changes, auto fertilizer dosing etc. etc. I have half a plan in my mind.
I've also started on the light fixture which I've modeled up in CAD, and plan on making out of an 8020 extrusion, and some 3D printed bits.
I'm using bridgelux gen 3 thrive CW (3000k) and WW (5000k) LED strips which have super high CRI at 98+ along with some specific XPE2 wavelengths that I'll solder onto some starboards. Far Red (730nm), Red (654nm), Cyan (495nm), Blue (455nm), Visible UV (415nm). Each segment of the white channels will be on its own driver so I can adjust left to right brightness in thirds, and each colour channel on its own driver so I can vary each channel on a time-based approach.
These will be run from a custom PCB board with Meanwell N-LDD drivers, and will run ESPHome on an ESP32 so it can link up with my Home Assistant installation.
That's it for now, this will probably be a very slow build so be warned if you follow along!
89 Replies
·
6245 views

Hey guys, needing some expert insight on my 90P build regarding the Yugang reactor. I’d like a sanity check on sizing.
System
What I measured

View attachment y2.mp4
System
- Display: 90 × 45 cm outside, 10 mm glass, so ~88 × 43 cm inside (~3,780 cm²), rimless, lidless.
- Sump: 20-gallon long (76 × 30 cm, ~2,280 cm²), 3 chambers, loose lid.
- About 220 L total water.
- Return enters below the surface; no deliberate surface agitation.
- BeanAnimal overflow, with the main draining underwater (no cascade).
- Currently cycling on tap water: KH 13, GH 12. The plan is RO remineralised to KH 3–4.
- Horizontal Yugang, 3" Sch40 PVC (ID 77.9 mm), 46 cm long.
- Outlet rotated to near the limit of what my plumbing allows, so the pocket is much smaller than half-full.
- CO₂ flow meter at about 9 mL/min. That’s slightly over what it dissolves, so it gives small occasional burps.
What I measured
- Plateau: pH 6.80 at KH 13 ~ 60 ppm (pH/KH estimate). Degassed baseline pH at 8.2.
- Overnight decay after CO₂ off: k ≈ 0.12/h (half-life ~5.7 h). That implies a CO₂ exchange rate of ~4–7 cm/h, i.e. a calm surface.
- Working the 1/17.7 rule backwards from my reactor area (~180–358 cm² depending on rotation), my effective loss area is ~1,100–2,200 cm², against ~6,060 cm² of real water surface (display + sump).
View attachment y2.mp4
4 Replies
·
44 views

Rockstar
Journal 22 gallon long bookshelf
Time to start a new thread.
I’ll fill in some details later, but I’m working on the hardscape now. Any and all criticism is appreciated. The vision is nothing more, and nothing less, than something appealing to the eye.
90cm x 30cm x 30cm Lifegard Aquatics ultra clear bookshelf tank. Buce and anubias on the hardscape, stems towards the back and center, mid to front carpet with some changes in shade and texture down to a flat grade on the right side of the tank.
Lily pipe inlet and skimmer will be in the back left corner with the outflow in the front left to hopefully achieve circular flow. I’ll be running an in-line diffuser. Light will be the P600 Pro that I regrettably did not upside to 900. Oh well. I’ll mount it high and hopefully it’ll have enough spread.
I have some dragon stone and red lava rock rubble I’ll use at the base to blend into the substrate, as well as some stratum I may or may not cap with.


I’ll fill in some details later, but I’m working on the hardscape now. Any and all criticism is appreciated. The vision is nothing more, and nothing less, than something appealing to the eye.
90cm x 30cm x 30cm Lifegard Aquatics ultra clear bookshelf tank. Buce and anubias on the hardscape, stems towards the back and center, mid to front carpet with some changes in shade and texture down to a flat grade on the right side of the tank.
Lily pipe inlet and skimmer will be in the back left corner with the outflow in the front left to hopefully achieve circular flow. I’ll be running an in-line diffuser. Light will be the P600 Pro that I regrettably did not upside to 900. Oh well. I’ll mount it high and hopefully it’ll have enough spread.
I have some dragon stone and red lava rock rubble I’ll use at the base to blend into the substrate, as well as some stratum I may or may not cap with.
309 Replies
·
35204 views

Supporting
I'm looking for recommendations for neocaridina retailers. I'd like to order them at the end of October, and have them shipped to Asheville NC.
Any recommendations?
Any recommendations?
17 Replies
·
991 views

Supporting
I Donated 2026
Rockstar
Journal Jay's 22 Long Iwagumi
I thought I would go ahead and get an early start on the journal for my next build. Still some prep work to complete but I was able to sneak some time in this evening to do some leak testing.
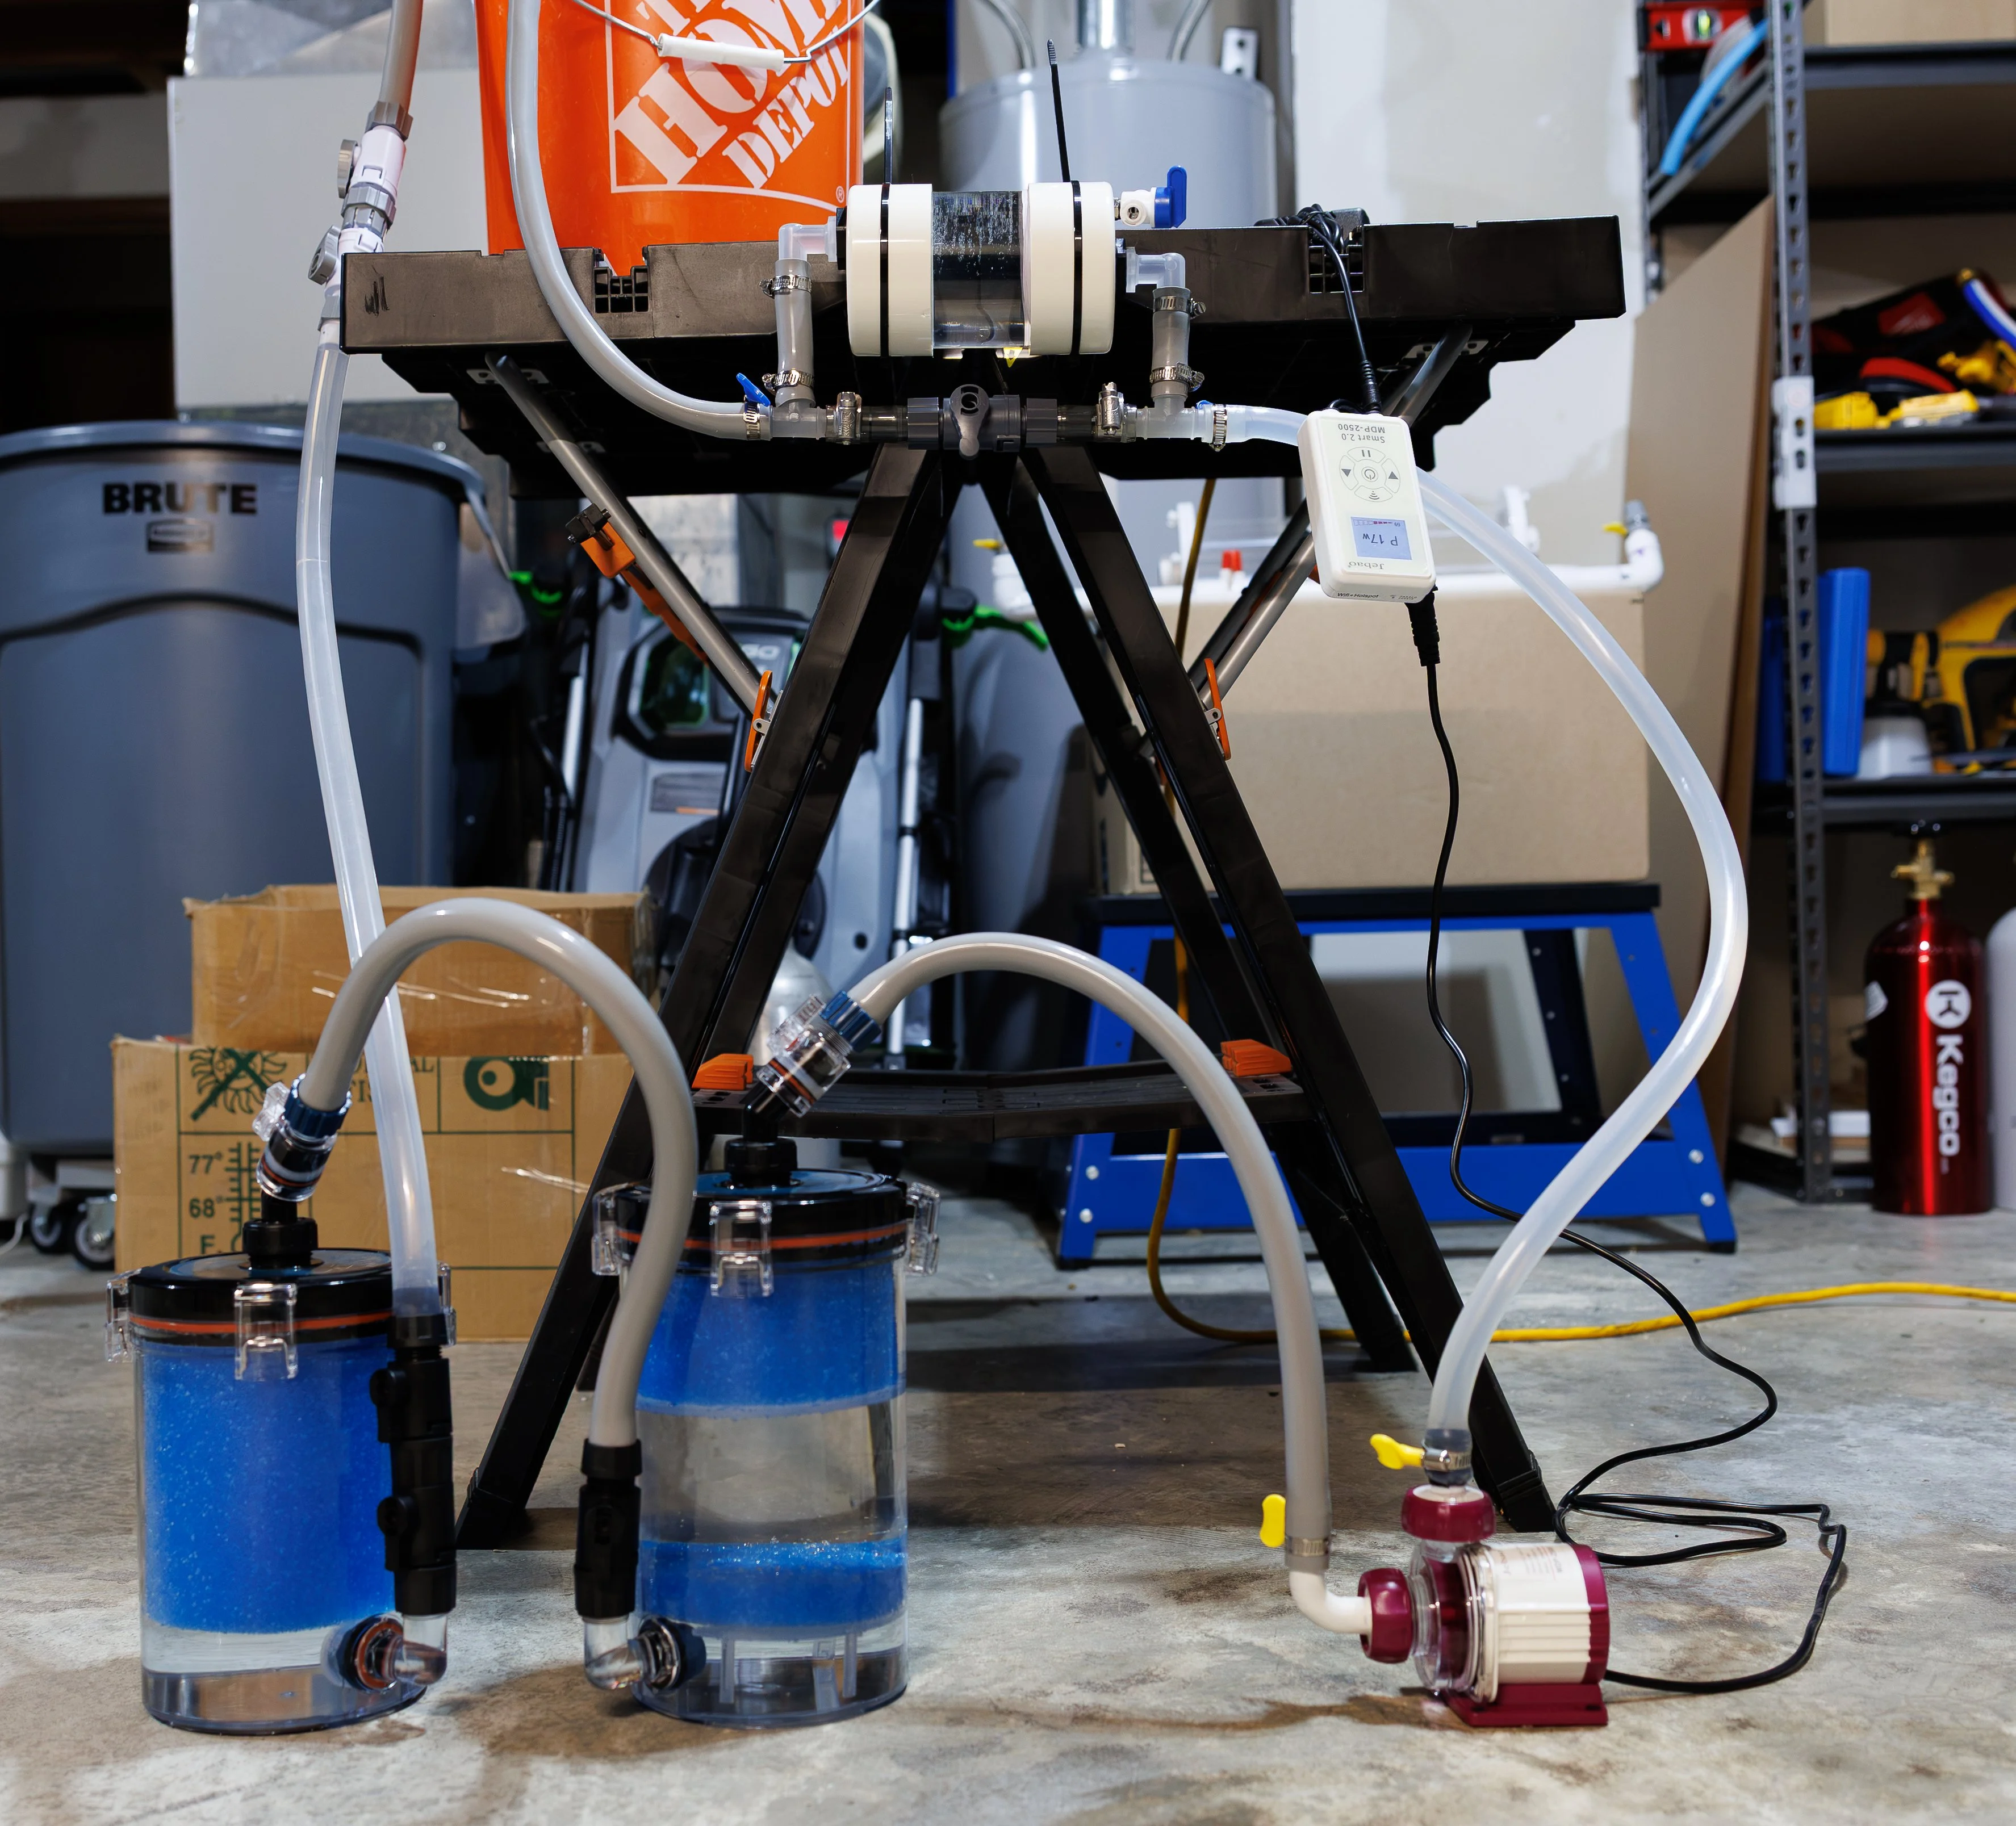
No need for a ton of media on this tank so I'll be using the "Temu" filters I recently talked about; one is a full foam prefilter and the other is part foam, part matrix. I failed to mention, when I posted my initial unboxing of the temu filters, that they do come in 2 sizes for each configuration, a 200 series, and the slightly larger 240 series. I think using the smaller 200 as the prefilter will work well in this setup. I was really surprised to see how much the foam expanded once it got wet. I may actually remove the top portion of foam in the filter with the matrix. Also, I confirmed the Netlea valves do work on the Temu filters.
I'm going with the MDP-2500 pump which may seem overkill for a 22g tank, but since it's 90cm in length, I want to make sure I have good flow end-to-end, and the 1500 pump I tried wasn't giving me quite what I wanted. I still also have to go through an inline heater as well, with several elbow fittings mixed in. I'll be able to adjust this pump down to just what I want. I'm also using the 3D printed barbs I modeled with the pump. I initially had issues with my elbow fittings leaking just as @renesis did on their high tech build. After seeing renesis's fix of coating the elbow with epoxy, I was about to try the same but realized I had a small can of spray-on Flex Seal so thought I'd give that a try. So far, it seems to be working fine on the elbow fitting. I do have a small leak on the output straight fitting but I think that's a different issue.
Otherwise, no other leaks which surprised me as I was expecting some on my DIY CO2 reactor which is a bit different design than my previous builds. It's working great and I want to give a shoutout to @Yugang for the idea of simply using some teflon sealing tape to seal the PVC caps to the Acrylic tube. You don't even need many wraps. I made the mistake of using too much on one end and when I tried to take it back off, it was quite a struggle, almost as if I had glued it, so trust me, as long as your cap I.D. matches your pipe O.D., a few wraps should do the trick.
More to come.
No need for a ton of media on this tank so I'll be using the "Temu" filters I recently talked about; one is a full foam prefilter and the other is part foam, part matrix. I failed to mention, when I posted my initial unboxing of the temu filters, that they do come in 2 sizes for each configuration, a 200 series, and the slightly larger 240 series. I think using the smaller 200 as the prefilter will work well in this setup. I was really surprised to see how much the foam expanded once it got wet. I may actually remove the top portion of foam in the filter with the matrix. Also, I confirmed the Netlea valves do work on the Temu filters.
I'm going with the MDP-2500 pump which may seem overkill for a 22g tank, but since it's 90cm in length, I want to make sure I have good flow end-to-end, and the 1500 pump I tried wasn't giving me quite what I wanted. I still also have to go through an inline heater as well, with several elbow fittings mixed in. I'll be able to adjust this pump down to just what I want. I'm also using the 3D printed barbs I modeled with the pump. I initially had issues with my elbow fittings leaking just as @renesis did on their high tech build. After seeing renesis's fix of coating the elbow with epoxy, I was about to try the same but realized I had a small can of spray-on Flex Seal so thought I'd give that a try. So far, it seems to be working fine on the elbow fitting. I do have a small leak on the output straight fitting but I think that's a different issue.
Otherwise, no other leaks which surprised me as I was expecting some on my DIY CO2 reactor which is a bit different design than my previous builds. It's working great and I want to give a shoutout to @Yugang for the idea of simply using some teflon sealing tape to seal the PVC caps to the Acrylic tube. You don't even need many wraps. I made the mistake of using too much on one end and when I tried to take it back off, it was quite a struggle, almost as if I had glued it, so trust me, as long as your cap I.D. matches your pipe O.D., a few wraps should do the trick.
More to come.
2 Replies
·
87 views

Staff member
I Donated 2026
Founding Member
Hello Welcome, kneeshg
Welcome to ScapeCrunch, @kneeshg!
We would love to get to know you. Please tell us about yourself. What tank do you have?
We would love to get to know you. Please tell us about yourself. What tank do you have?
0 Replies
·
13 views
Staff member
I Donated 2026
Founding Member
Hello Welcome, Ilja
Welcome to ScapeCrunch, @Ilja!
We would love to get to know you. Please tell us about yourself. What tank do you have?
We would love to get to know you. Please tell us about yourself. What tank do you have?
0 Replies
·
15 views
Staff member
I Donated 2026
Founding Member
Hello Welcome, Renuprajan
Welcome to ScapeCrunch, @Renuprajan!
We would love to get to know you. Please tell us about yourself. What tank do you have?
We would love to get to know you. Please tell us about yourself. What tank do you have?
1 Replies
·
88 views

Rockstar
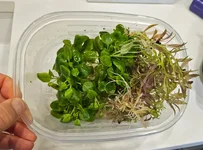
These plants have been sitting in this container in the dark for 9 days. They are still wet, but the container isn't 100% air tight.
Plants look great. They are crispy and green. I removed them from the tank on Oct 11. It's Oct 20.
I haven't had a chance to do hardly any tank maintenance since my trip, but I needed to get some stuff out to make room for some tc plants I ordered.
I thought someone might want some of this, so I put it in this container, and was going to offer it all up if I thought I'd have time to ship. (Too late now)
I can't believe how long they've lasted.
So if you need a way to store some plants for a few days. This might be an option.
Note: Both things were pulled up roots and all. If I had cut stems, they might not have lasted?
Plants look great. They are crispy and green. I removed them from the tank on Oct 11. It's Oct 20.
I haven't had a chance to do hardly any tank maintenance since my trip, but I needed to get some stuff out to make room for some tc plants I ordered.
I thought someone might want some of this, so I put it in this container, and was going to offer it all up if I thought I'd have time to ship. (Too late now)
I can't believe how long they've lasted.
So if you need a way to store some plants for a few days. This might be an option.
Note: Both things were pulled up roots and all. If I had cut stems, they might not have lasted?
2 Replies
·
61 views