
Welcome to ScapeCrunch
We are ScapeCrunch, the place where planted aquarium hobbyists come to build relationships and support each other. When you're tired of doom scrolling, you've found your home here.
Social Feed

Supporting
I Donated 2026
Rockstar
Journal Jay's "75g" Farm/Garden Scape
Time to get a new journal started. The start of this aquarium will eventually result in the total rescape of some and even final end to others.
So why is 75g in quotes? It seems that the budget pet store aquarium brands like to over state the volume of their tanks. This is a used Marineland tank and stand combo I purchased off marketplace. Marineland markets it as a 75 gallon tank. At best, it's only a 67 gallon tank. Filled with BDBS and including the volume of the filter, tubing, and reactor, real volume is just over 64 gallons. End of rant, now the details.
This tank has a number of purposes/goals:
1. Serve as a tank to grow many different plants.
2. Serve as a temporary holding tank for fish.
3. Serve as a testbed for my first fully inert substrate tank with water column dosing only, using separate macros and micros rather than an all-in-one fertilizer.
4. Try my hand at designing and maintaining a Garden/Hybrid Dutch style layout.
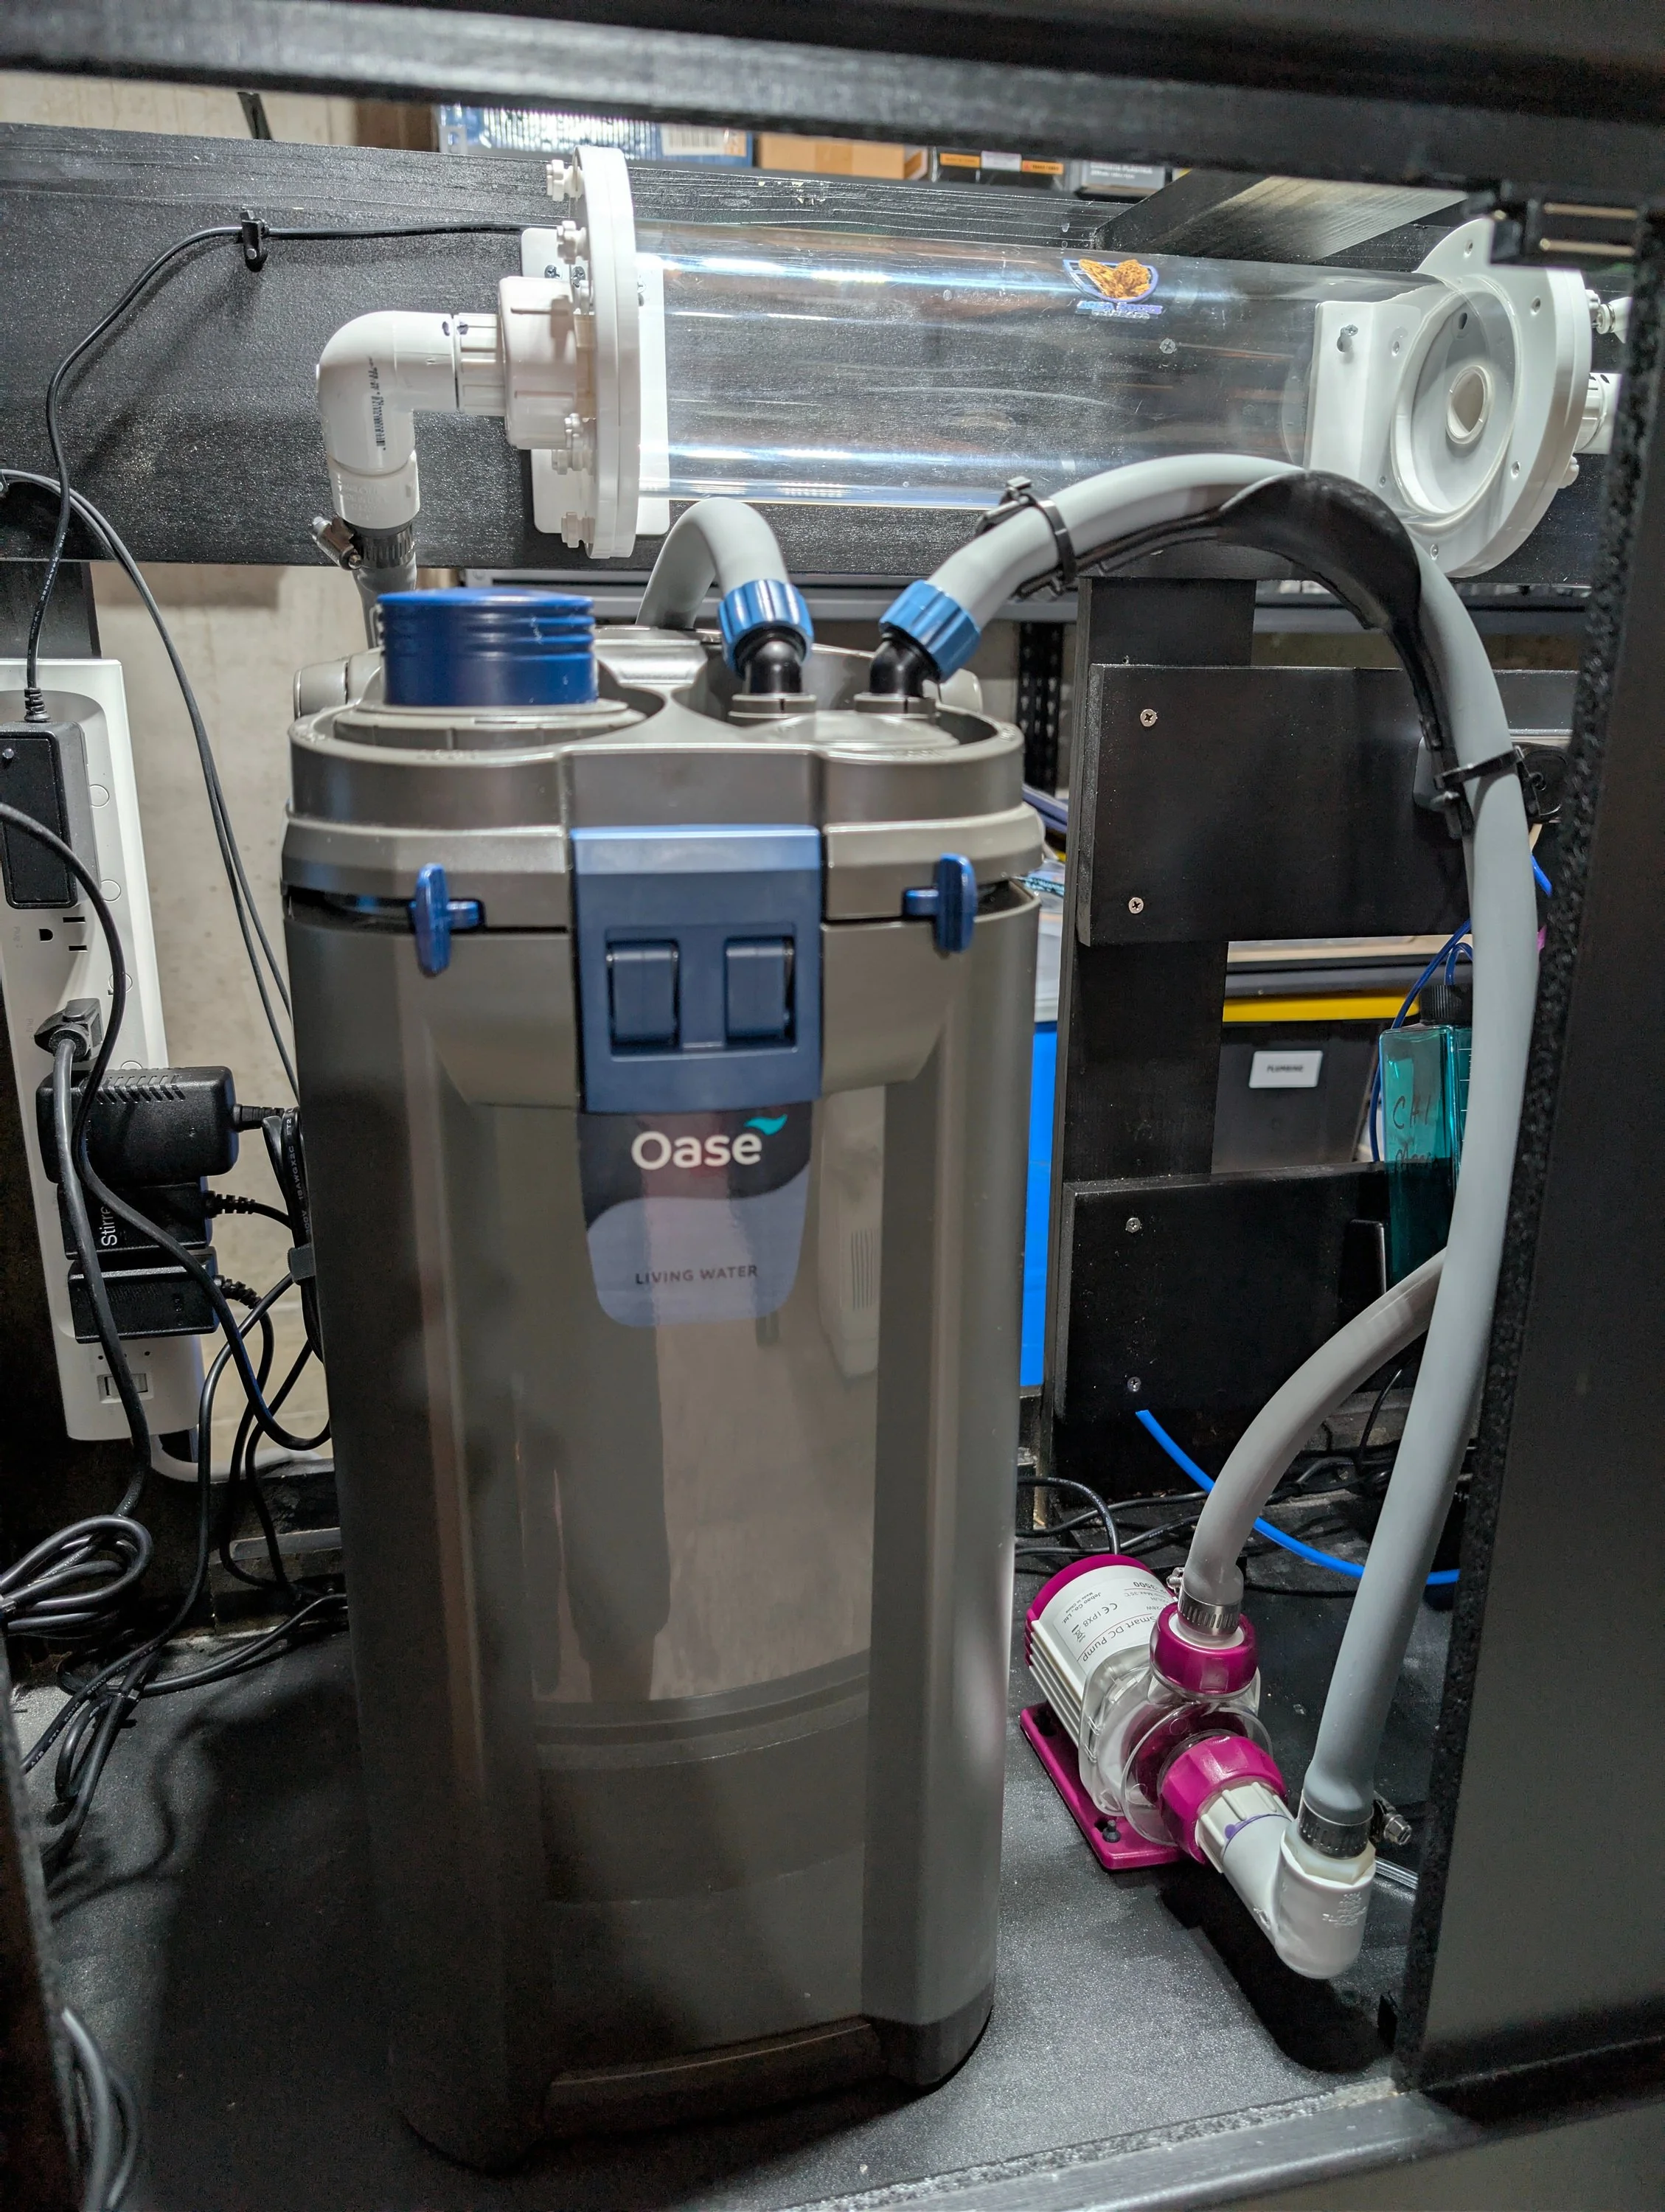
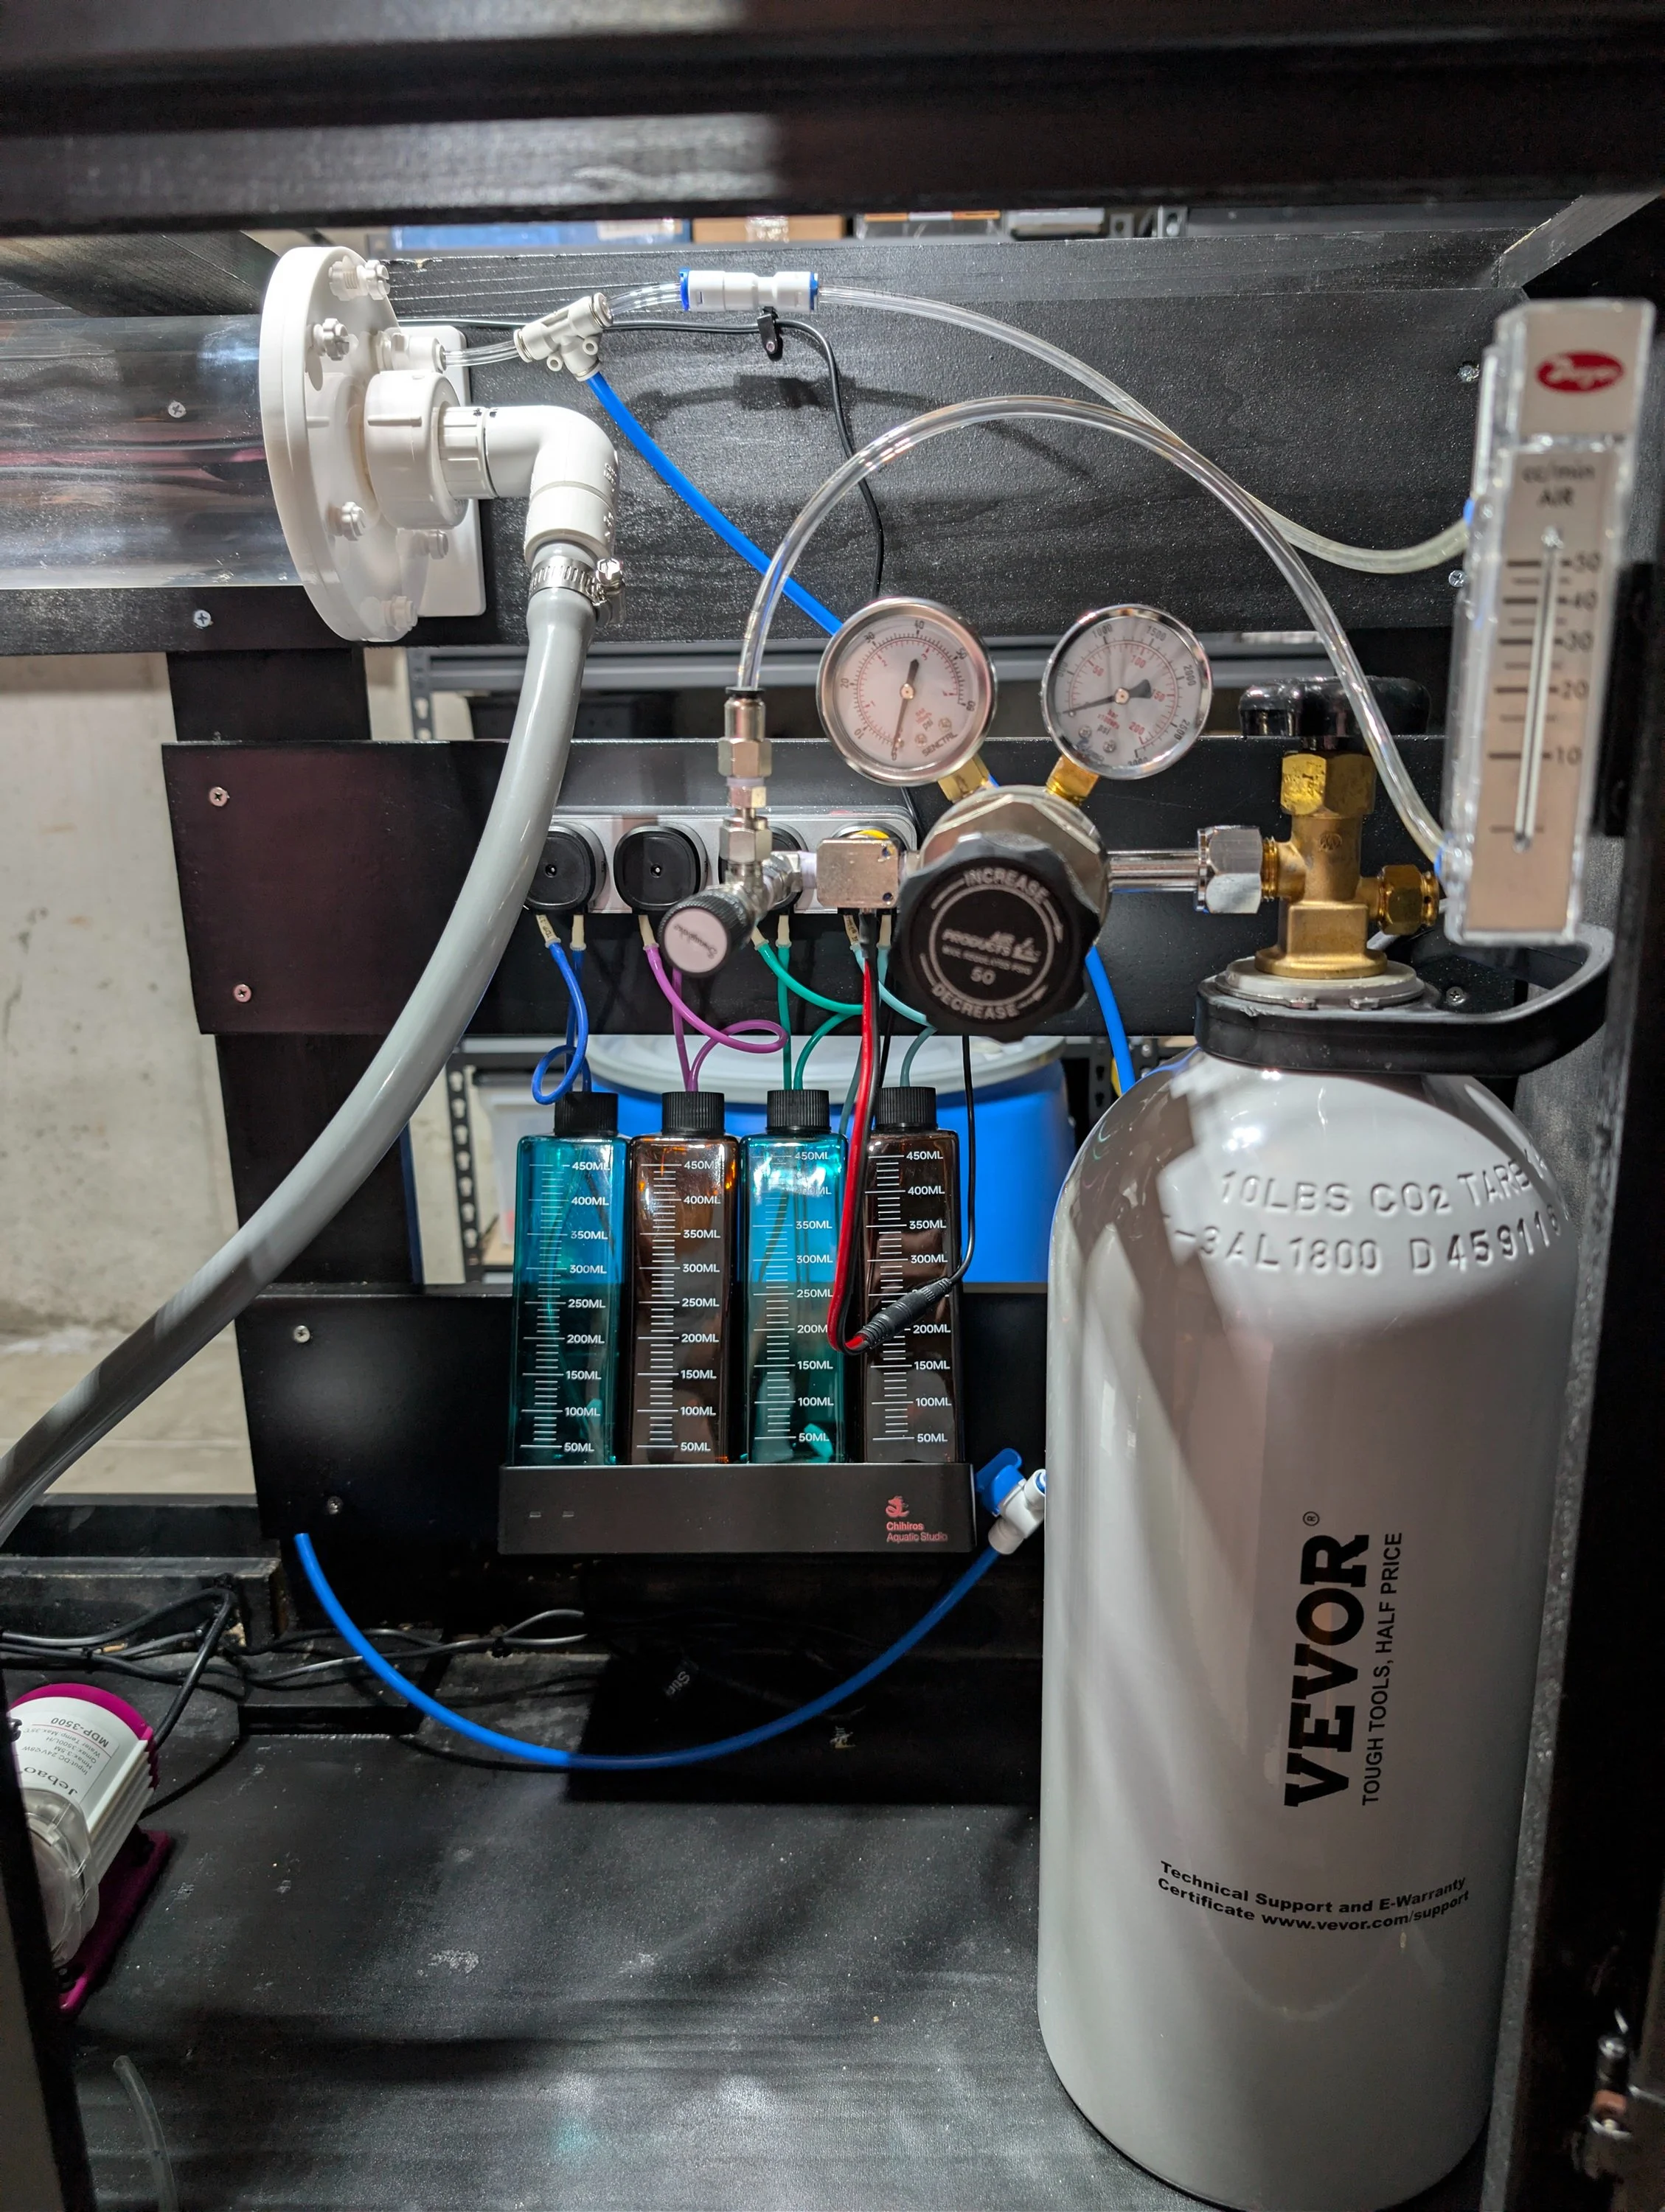
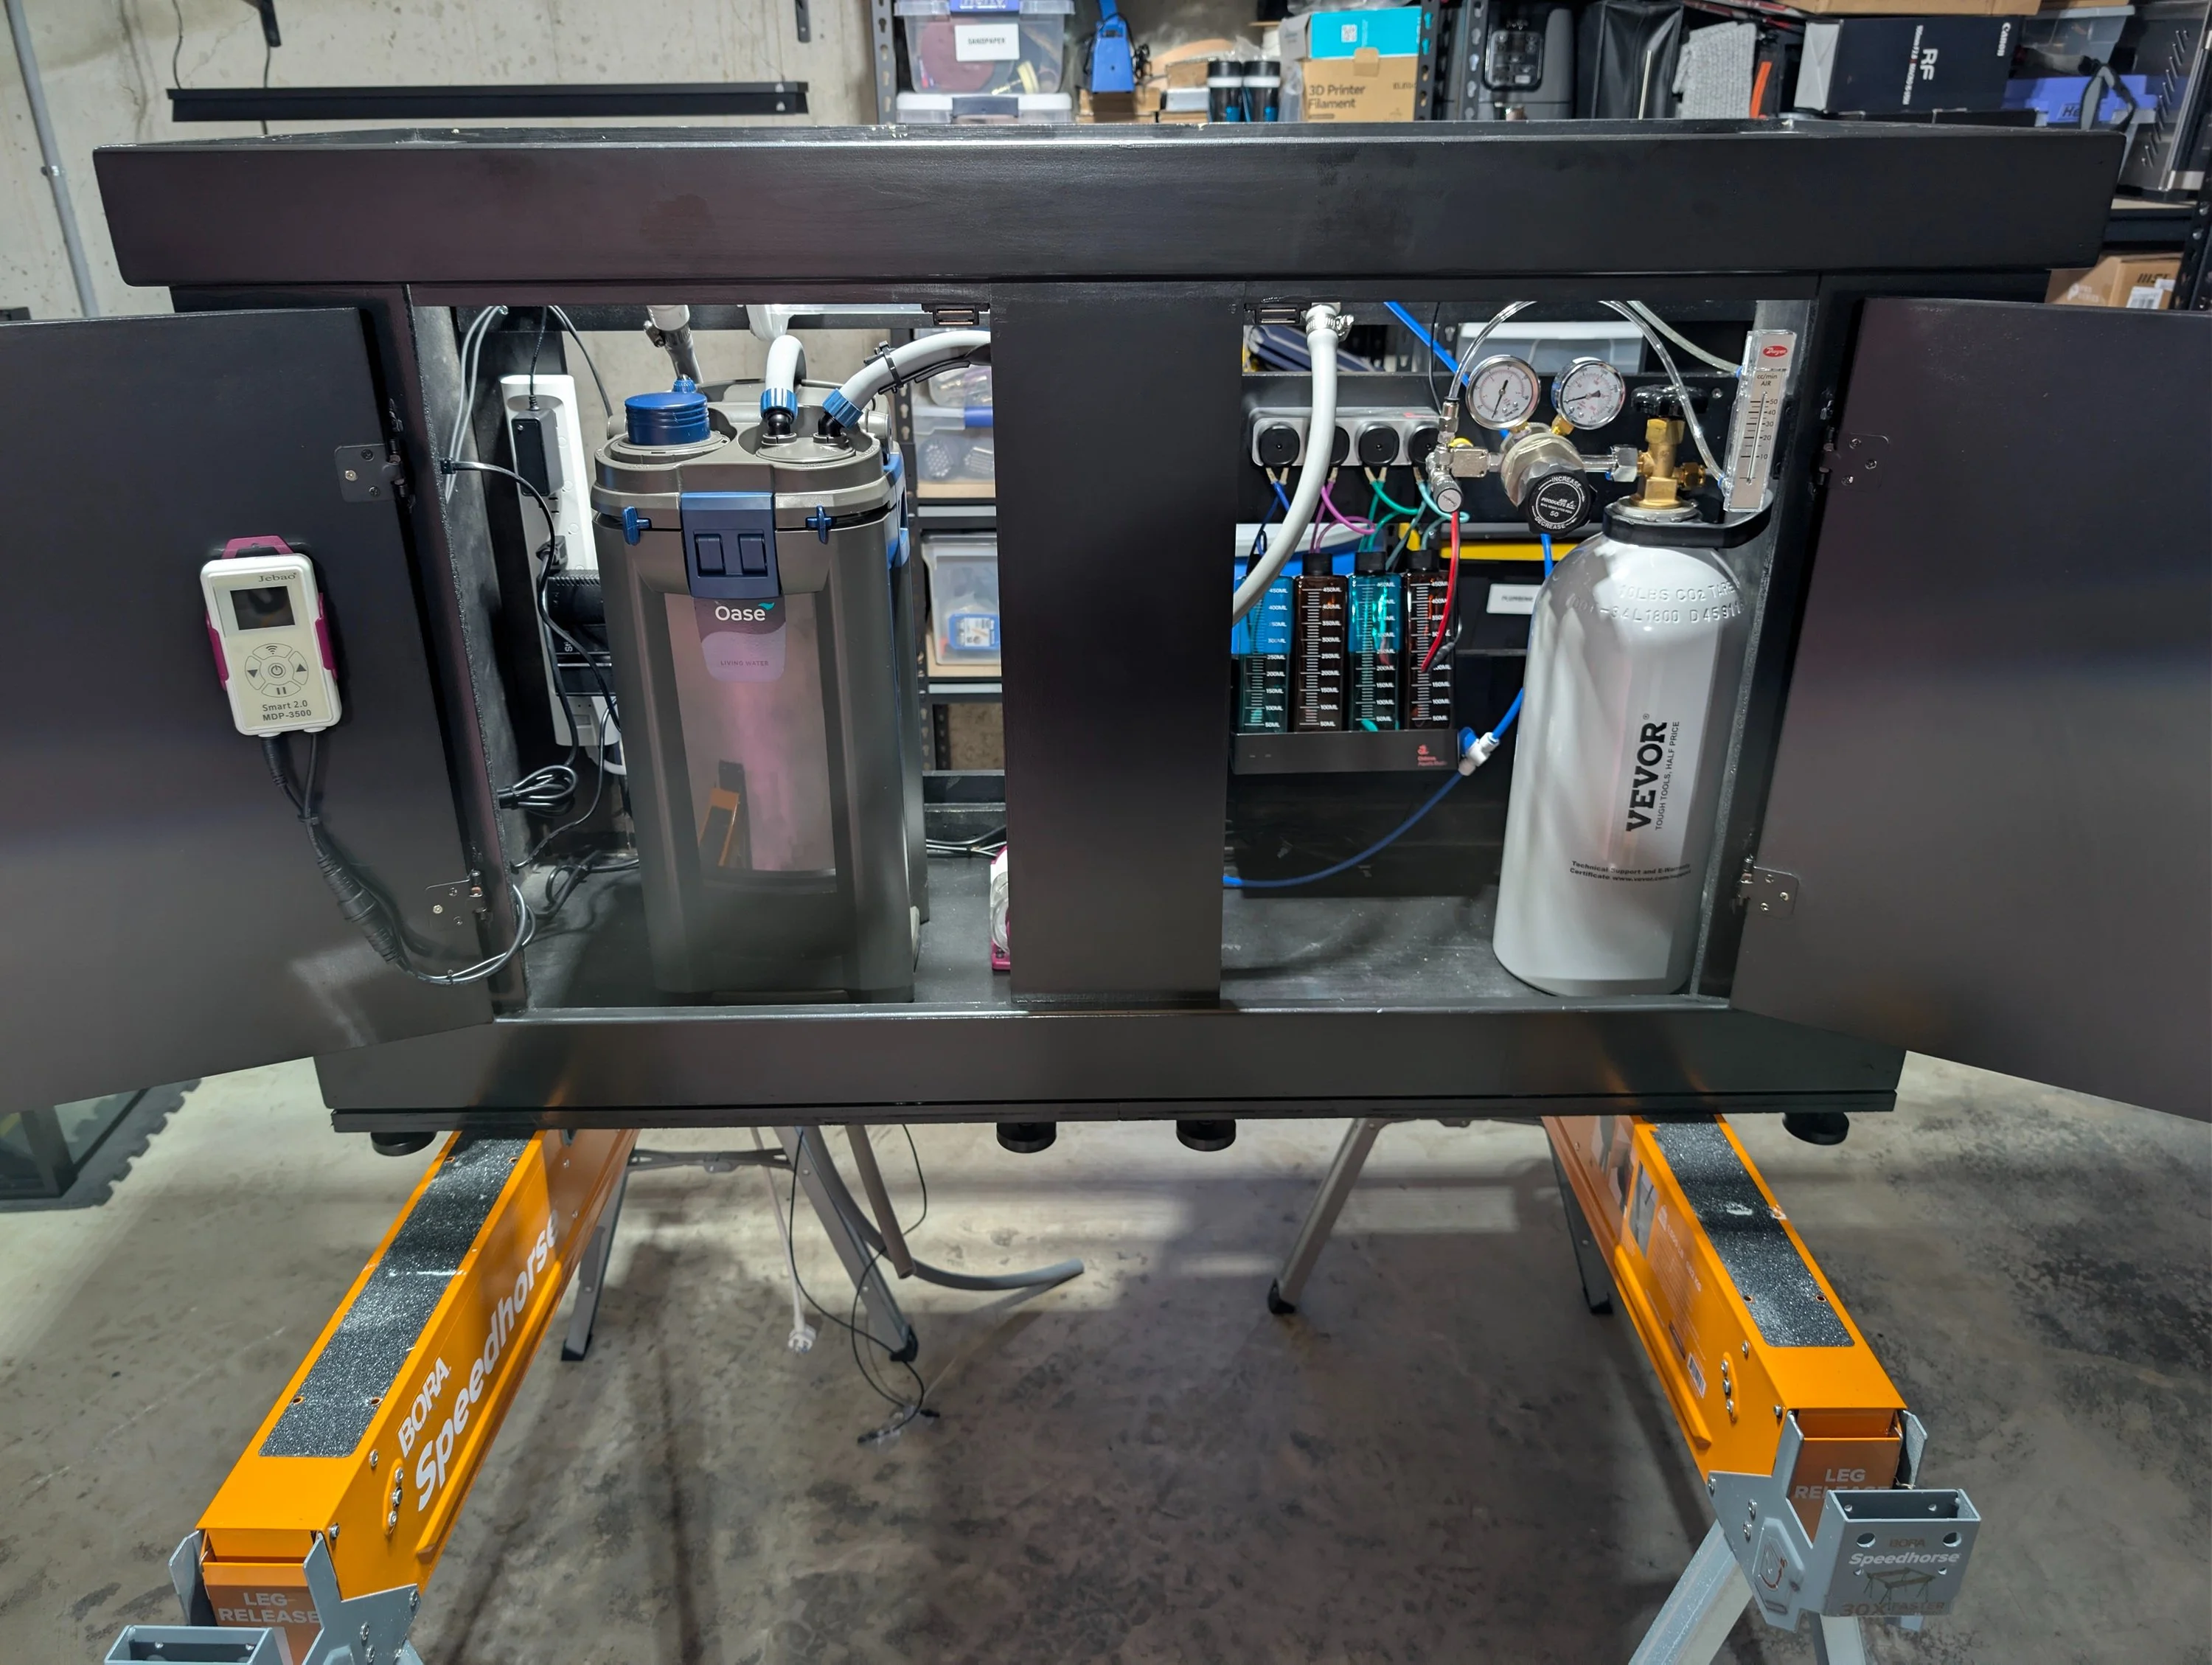
I began getting this tank and stand ready quite some time ago but other projects got in the way. Like my current 40g farm tank, this is setup on the "work" side of my basement. The other side of the basement was finished when I purchased the house but it was done rather poorly and has been in mid demo mode for some time. It will eventually be remodeled to be the aquarium "gallery". Once that happens, this tank may simply become a farm/quarantine tank. My basement floor is far from level so I had to add leveling feet to the stand. I soon realized however, the bottom of the cheap stand is only 1/2" wood?? and with the resulting gap underneath, the weight of an Oase 850 filter and 10lb CO2 tank caused the bottom to flex a good amount. I decided I needed to make some mods to provide a little more support. I added a sheet of 3/4" plywood across the entire bottom including the finishing strips. I used a lot of wood glue and brads to secure it and then upgraded to some heavier duty leveling feet.. That did the trick as it's much more solid now. While I had the stand up on the saw horses I also made a few changes to the inside build. I swapped out the dosing bottle holder to a powered stirrer courtesy of a great deal from @Naturescapes_Rocco, mounted the Dwyer flow meter where it can be easily read, mounted the new Jebao return pump controller to the door, and cleaned up the wiring.
Build and Hardware Details
Oase Biomaster Thermo 850 (internal impeller disabled)
Oase stock In/Out pipes using spraybar
Oase Crystalskim 350 Skimmer
Jebao MDP-3500 Return Pump
10lb CO2 tank with DIY "Bettatail" regulator and Dwyer RMA-151 Flow Meter
Aqua Rocks Colorado Small Acrylic Yugang CO2 Reactor
Chihiros 4 Channel Doser plus Stirrer
Inkbird ITC-306A Temp Controller
Week Aqua L1200 Light
Substrate and Fertilization
Black Diamond Blasting Sand (no root tabs or other material under the BDBS)
Burr Aqua Macros and Micros
There were a couple of gotchas in the last 2 days getting things finalized so the tank can start cycling. Yesterday while calibrating the doser, I couldn't get any channel to prime. This doser has been sitting on the shelf for quite some time but had been used before. I had to take apart the pump heads and pinch and stretch the tubing, and after putting it back together, everything worked fine and calibration was right on the first time.
The worse gotcha was today on the first turn on and leak test. It's always the nervous time, and for good reason. Priming the system went fine, no leaks, but as soon as I turned the pump on, I heard spraying ! Problem was with the ARC reactor. I purchased the reactor a long time ago but realized it was too large for my 49g tank, so It's been sitting on the shelf waiting for one of these 120cm tanks. Unfortunately, I never even leak tested it. I wish I had, because I might have returned it to ARC. The problem is with the CO2 input. There is the push-to-fit part that screws in, and then the permanent mounted insert the fitting screws into. That permanent insert was actually the cause of the leak. After pulling everything back out of the cabinet and taking the reactor apart, I could see that the insert was cracked. For now, I've bypassed the reactor so the tank cycling can commence. This was important because several trays of matrix in the filter came from my other established tanks and I also seeded the tank with a sponge from one of the established filters. Over the next couple week, I'll get the ARC reactor fixed and back in place.
Also in the next couple weeks I'll do some flow testing and provide results for those curious as to how combining the Jebao pump with the Oase filter works out. I can tell you this already, in a 120cm tank, 100% power is far too much. Pulling water through the fully setup 850 doesn't faze the MDP-3500. I have it set at 55% right now and even with a spraybar, will probably need to turn it down once planted. I think the MDP-2500 would be more than enough for this setup. In fact, I may add a bypass to the ARC reactor while I have it out. Of course, it's also very quiet, even at the 100% power level.
I expect the tank to cycle fairly quickly and may start planting in a couple weeks. Most plants will come from my farm and other tanks for now, but I'll be thinking about what other plants I need to fill in for a proper Dutch look. The current 40g farm tank will be shutting down and going by-by once this tank is cycled. Also, my first aquascape, the 49g, will be getting torn down for a full rescape shortly after and the fish in it will be getting rehomed to this tank for the immediate future.
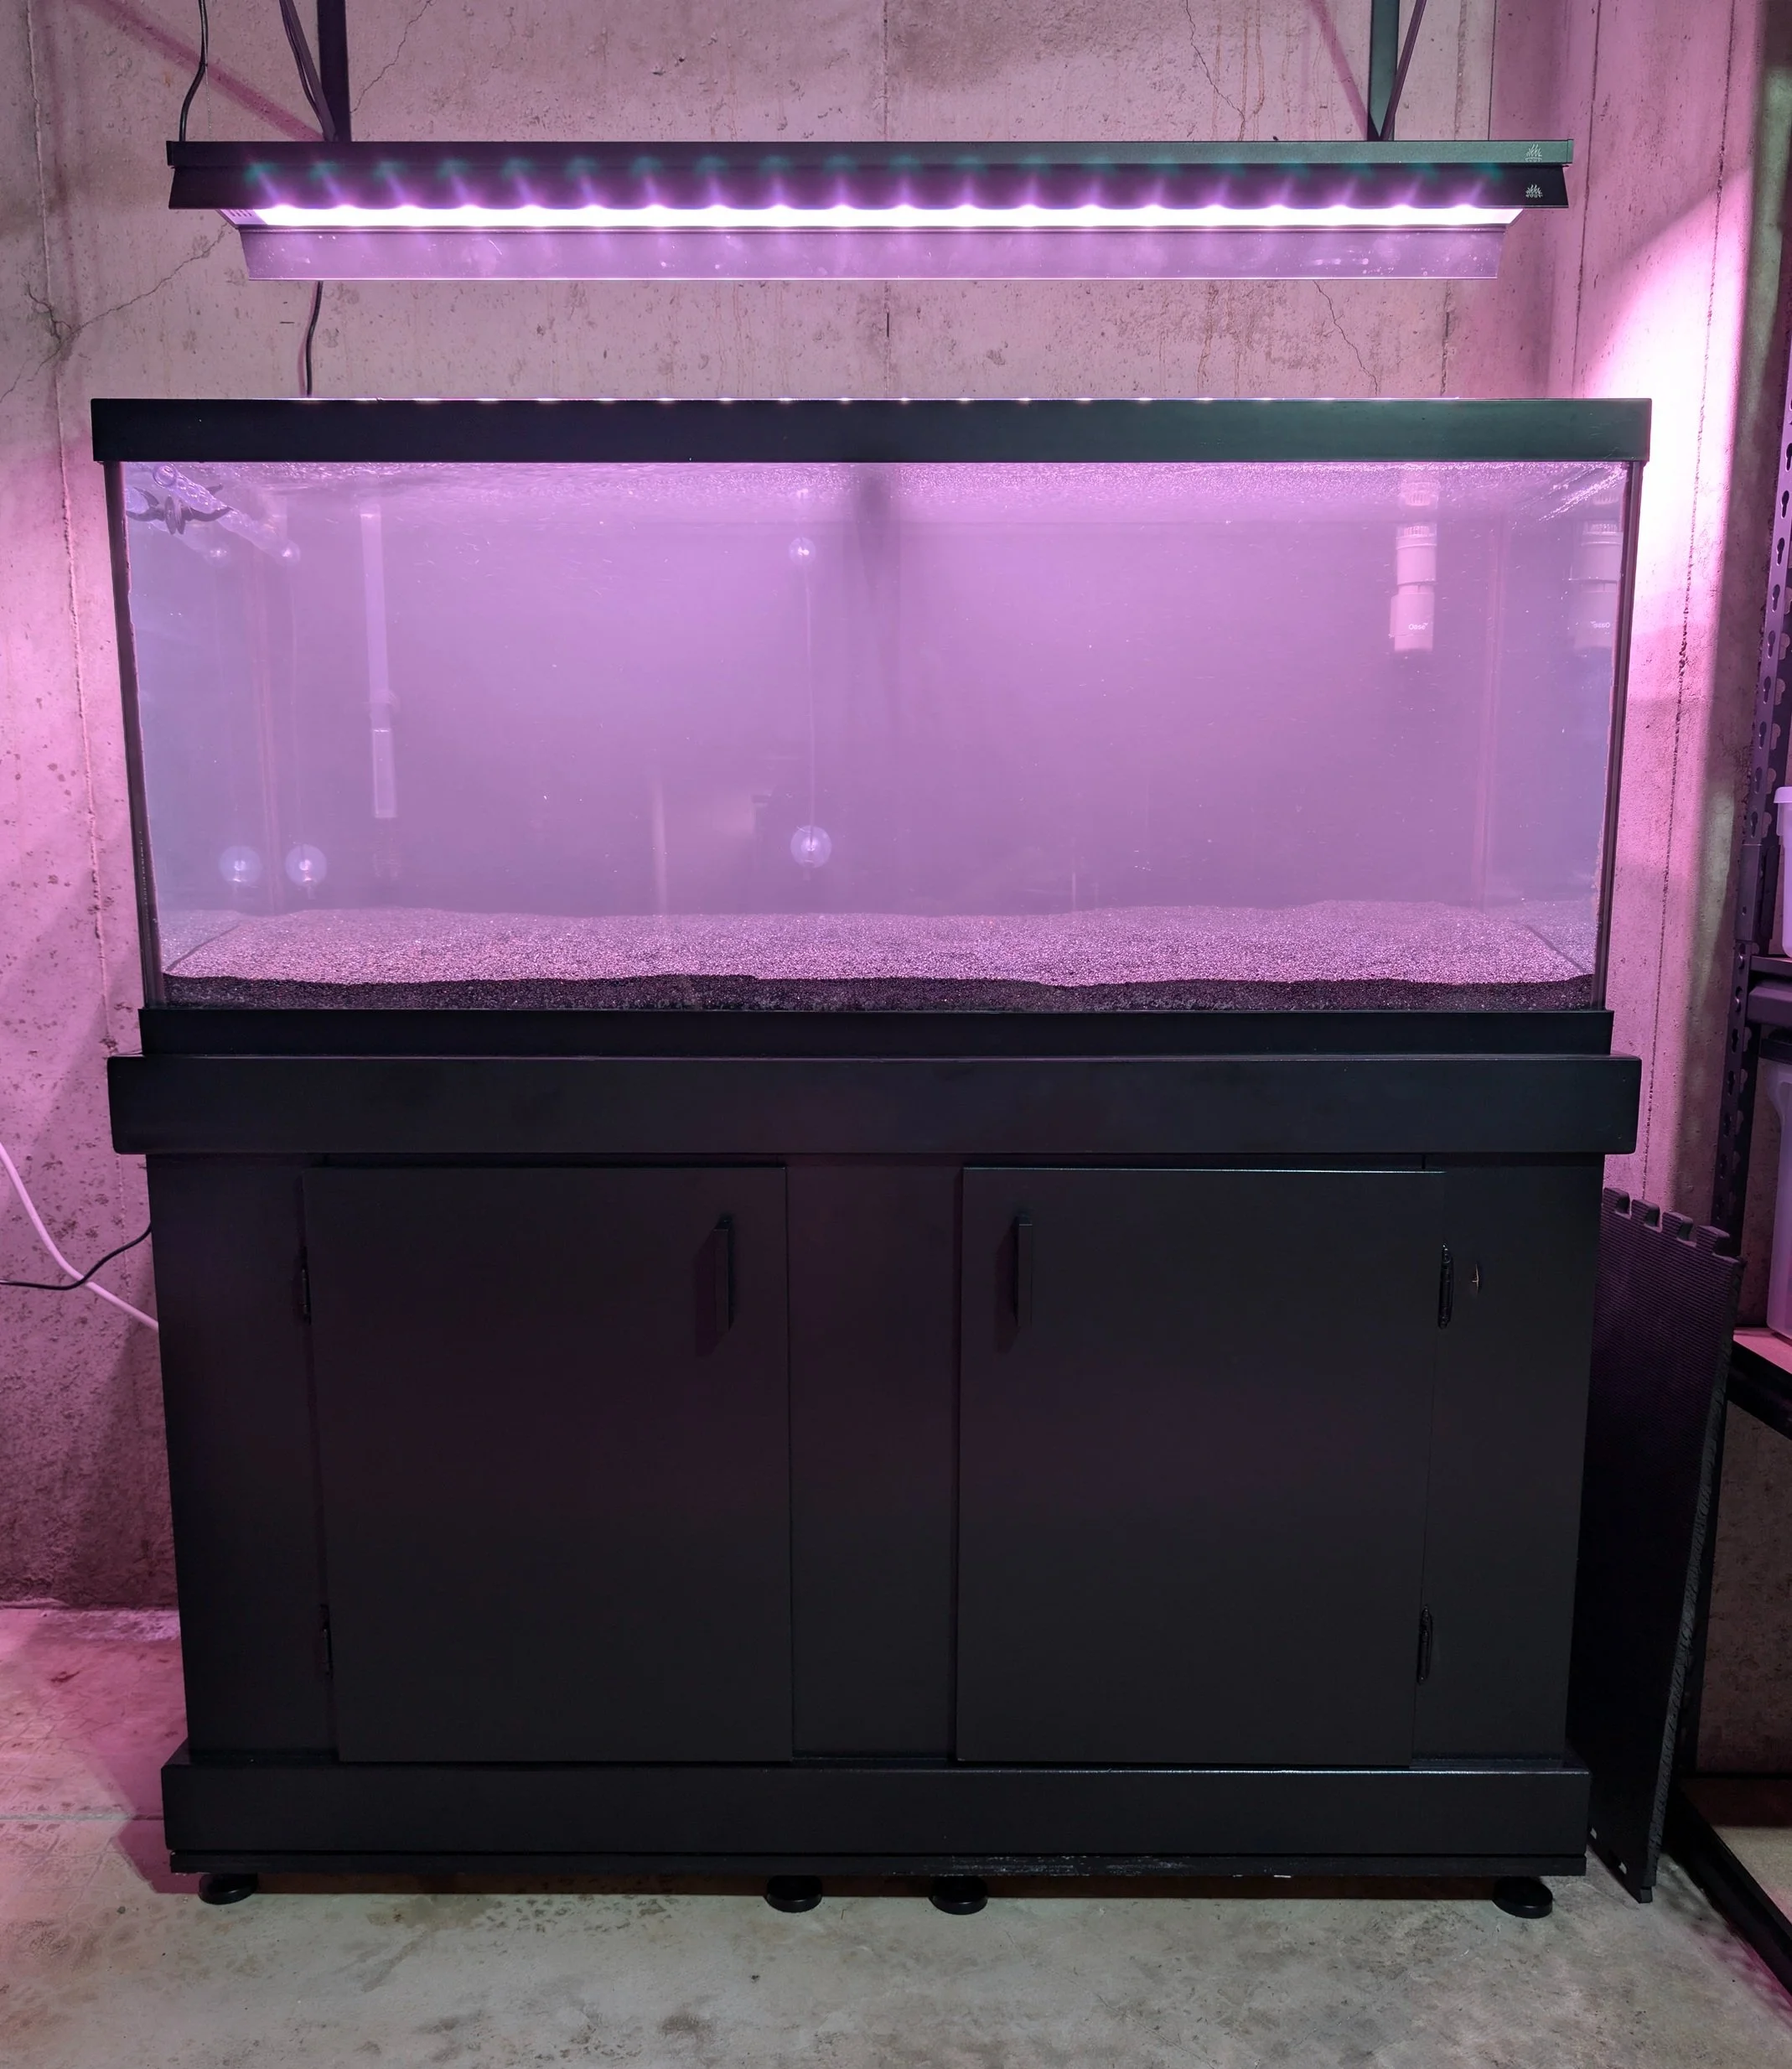

So why is 75g in quotes? It seems that the budget pet store aquarium brands like to over state the volume of their tanks. This is a used Marineland tank and stand combo I purchased off marketplace. Marineland markets it as a 75 gallon tank. At best, it's only a 67 gallon tank. Filled with BDBS and including the volume of the filter, tubing, and reactor, real volume is just over 64 gallons. End of rant, now the details.
This tank has a number of purposes/goals:
1. Serve as a tank to grow many different plants.
2. Serve as a temporary holding tank for fish.
3. Serve as a testbed for my first fully inert substrate tank with water column dosing only, using separate macros and micros rather than an all-in-one fertilizer.
4. Try my hand at designing and maintaining a Garden/Hybrid Dutch style layout.
I began getting this tank and stand ready quite some time ago but other projects got in the way. Like my current 40g farm tank, this is setup on the "work" side of my basement. The other side of the basement was finished when I purchased the house but it was done rather poorly and has been in mid demo mode for some time. It will eventually be remodeled to be the aquarium "gallery". Once that happens, this tank may simply become a farm/quarantine tank. My basement floor is far from level so I had to add leveling feet to the stand. I soon realized however, the bottom of the cheap stand is only 1/2" wood?? and with the resulting gap underneath, the weight of an Oase 850 filter and 10lb CO2 tank caused the bottom to flex a good amount. I decided I needed to make some mods to provide a little more support. I added a sheet of 3/4" plywood across the entire bottom including the finishing strips. I used a lot of wood glue and brads to secure it and then upgraded to some heavier duty leveling feet.. That did the trick as it's much more solid now. While I had the stand up on the saw horses I also made a few changes to the inside build. I swapped out the dosing bottle holder to a powered stirrer courtesy of a great deal from @Naturescapes_Rocco, mounted the Dwyer flow meter where it can be easily read, mounted the new Jebao return pump controller to the door, and cleaned up the wiring.
Build and Hardware Details
Oase Biomaster Thermo 850 (internal impeller disabled)
Oase stock In/Out pipes using spraybar
Oase Crystalskim 350 Skimmer
Jebao MDP-3500 Return Pump
10lb CO2 tank with DIY "Bettatail" regulator and Dwyer RMA-151 Flow Meter
Aqua Rocks Colorado Small Acrylic Yugang CO2 Reactor
Chihiros 4 Channel Doser plus Stirrer
Inkbird ITC-306A Temp Controller
Week Aqua L1200 Light
Substrate and Fertilization
Black Diamond Blasting Sand (no root tabs or other material under the BDBS)
Burr Aqua Macros and Micros
There were a couple of gotchas in the last 2 days getting things finalized so the tank can start cycling. Yesterday while calibrating the doser, I couldn't get any channel to prime. This doser has been sitting on the shelf for quite some time but had been used before. I had to take apart the pump heads and pinch and stretch the tubing, and after putting it back together, everything worked fine and calibration was right on the first time.
The worse gotcha was today on the first turn on and leak test. It's always the nervous time, and for good reason. Priming the system went fine, no leaks, but as soon as I turned the pump on, I heard spraying
! Problem was with the ARC reactor. I purchased the reactor a long time ago but realized it was too large for my 49g tank, so It's been sitting on the shelf waiting for one of these 120cm tanks. Unfortunately, I never even leak tested it. I wish I had, because I might have returned it to ARC. The problem is with the CO2 input. There is the push-to-fit part that screws in, and then the permanent mounted insert the fitting screws into. That permanent insert was actually the cause of the leak. After pulling everything back out of the cabinet and taking the reactor apart, I could see that the insert was cracked. For now, I've bypassed the reactor so the tank cycling can commence. This was important because several trays of matrix in the filter came from my other established tanks and I also seeded the tank with a sponge from one of the established filters. Over the next couple week, I'll get the ARC reactor fixed and back in place.Also in the next couple weeks I'll do some flow testing and provide results for those curious as to how combining the Jebao pump with the Oase filter works out. I can tell you this already, in a 120cm tank, 100% power is far too much. Pulling water through the fully setup 850 doesn't faze the MDP-3500. I have it set at 55% right now and even with a spraybar, will probably need to turn it down once planted. I think the MDP-2500 would be more than enough for this setup. In fact, I may add a bypass to the ARC reactor while I have it out. Of course, it's also very quiet, even at the 100% power level.
I expect the tank to cycle fairly quickly and may start planting in a couple weeks. Most plants will come from my farm and other tanks for now, but I'll be thinking about what other plants I need to fill in for a proper Dutch look. The current 40g farm tank will be shutting down and going by-by once this tank is cycled. Also, my first aquascape, the 49g, will be getting torn down for a full rescape shortly after and the fish in it will be getting rehomed to this tank for the immediate future.
23 Replies
·
1117 views

Hey guys, I've made a couple of yugang reactors some horizontal, some vertical (soda bottle with a hole in it).
I've noticed a reoccuring issue constantly in that it will eventually fill up with air (oxygen) from plants pearling.
Once the co2 + oxygen concentration gets high enough, Oxygen from plant pearling will eventually make its way into the reactor. After a few days, this severely reduces its efficiency.
You would think the oxygen just gets pushed out by the co2 coming, but plants pearling will kinda just refill it up extremely fast.
Is yugang better in lower light tanks where you won't get intense pearling? I usually find co2 misting much more consistent in this case and might swap back to just using a ceramic diffuser for consistency. I only have 10 gallon tanks... a ceramic diffuser is fine, its just easy to nuke your tank with too much co2 where yugang limits your co2 ppm based on reactor size.
I've noticed a reoccuring issue constantly in that it will eventually fill up with air (oxygen) from plants pearling.
Once the co2 + oxygen concentration gets high enough, Oxygen from plant pearling will eventually make its way into the reactor. After a few days, this severely reduces its efficiency.
You would think the oxygen just gets pushed out by the co2 coming, but plants pearling will kinda just refill it up extremely fast.
Is yugang better in lower light tanks where you won't get intense pearling? I usually find co2 misting much more consistent in this case and might swap back to just using a ceramic diffuser for consistency. I only have 10 gallon tanks... a ceramic diffuser is fine, its just easy to nuke your tank with too much co2 where yugang limits your co2 ppm based on reactor size.
21 Replies
·
836 views
Supporting
I Donated 2026
Rockstar
I've seen several in the community mention purchasing an Archaea cabinet. I just recently purchased the 60x45 "Assembly Required" version in the Driftwood color and assembled it yesterday evening. It went together quite quickly without even downloading the instructions. I gotta say, I think it's absolutely a good option, if you're not wanting to build a cabinet yourself, but gag at the high cost of other aquarium cabinets sold by the high-end tank brands. I considered the slightly more expensive pre-built model, but it's cost doesn't include the freight shipping. Since this will be going in my living room, I didn't want to take chances on my own build and finishing skill. I think I made the right choice.
Archaea Modern-Nature Aquarium Cabinet
Archaea Modern-Nature Aquarium Cabinet
1 Replies
·
28 views
Supporting
I Donated 2026
Rockstar
New (for me) reading to add to the bookshelf. Been wanting Amano San's books for some time but the price, even for used, is quite high. Finally bit the bullet on a used copy of the Complete Works since it was a little less expensive than used copies of the individual Nature Aquarium volumes. It will be next to George Farmer's book.
What other books do you have?

What other books do you have?
15 Replies
·
1079 views

Rockstar
Journal 22 gallon long bookshelf
Time to start a new thread.
I’ll fill in some details later, but I’m working on the hardscape now. Any and all criticism is appreciated. The vision is nothing more, and nothing less, than something appealing to the eye.
90cm x 30cm x 30cm Lifegard Aquatics ultra clear bookshelf tank. Buce and anubias on the hardscape, stems towards the back and center, mid to front carpet with some changes in shade and texture down to a flat grade on the right side of the tank.
Lily pipe inlet and skimmer will be in the back left corner with the outflow in the front left to hopefully achieve circular flow. I’ll be running an in-line diffuser. Light will be the P600 Pro that I regrettably did not upside to 900. Oh well. I’ll mount it high and hopefully it’ll have enough spread.
I have some dragon stone and red lava rock rubble I’ll use at the base to blend into the substrate, as well as some stratum I may or may not cap with.


I’ll fill in some details later, but I’m working on the hardscape now. Any and all criticism is appreciated. The vision is nothing more, and nothing less, than something appealing to the eye.
90cm x 30cm x 30cm Lifegard Aquatics ultra clear bookshelf tank. Buce and anubias on the hardscape, stems towards the back and center, mid to front carpet with some changes in shade and texture down to a flat grade on the right side of the tank.
Lily pipe inlet and skimmer will be in the back left corner with the outflow in the front left to hopefully achieve circular flow. I’ll be running an in-line diffuser. Light will be the P600 Pro that I regrettably did not upside to 900. Oh well. I’ll mount it high and hopefully it’ll have enough spread.
I have some dragon stone and red lava rock rubble I’ll use at the base to blend into the substrate, as well as some stratum I may or may not cap with.
274 Replies
·
30513 views
Rockstar
Journal Desktop nano paludarium.
I’ve had this idea in my head for a couple of years now and it’s finally taken shape. The inspiration came from a local conservation area/regional park. I wanted a tall nano scape with stone/wood hardscape with a pump/filter in the rear plumbed so the outflows exited at the top and trickled down the face of the scape. Primarily a moss scape dotted with some native accent plants.
Tank: 15cm x 15cm x 25cm ultra clea low iron nano tall with floating bottom.
Light: random plant light from local store.
Substrate: random top fin black pebble gravel that came in a bag with a marketplace tank setup.
Pump: random pump from my dad’s garage from one of my brothers super old tanks.
Plumbing: extra black RO 1/4” tubing and quick connect fittings from a reptile mist kit (for another project).
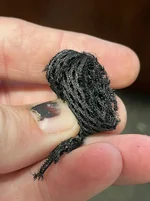
I started by building the frame with divider panels. There are two ledges that propped up the hardscape, and the whole frame was draped and buffered with 3d spacer mesh (Epiweb) to retain moisture and humidity near the top of the scape without needing a lid. The mesh also helps keep the wood in contact with water, and aids establishing moss.
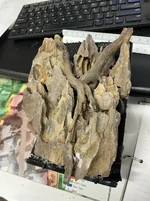
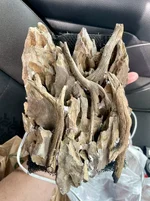
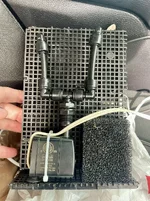
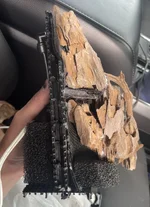
3d spacer mesh:
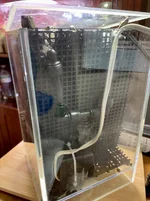
Back filter installed:
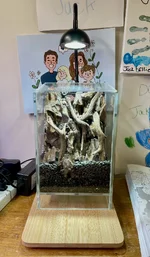
And the dry fitment test. Had to file down the rock on both sides so it fit without being forced in there. I constructed it this way so the whole scape could be pulled out at once if I needed to reset it, or just the pump if it needed to be serviced. More 3d spacer mesh was wedged in all the crevices for additional wicking.
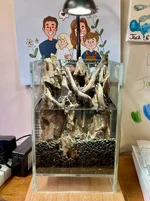
Topped up and testing:
Additional hardscape up top to help hide all the outflows, and provide space for the finishing flora (maybe some air plants and/or orchids).
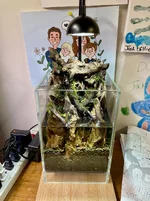
Tank: 15cm x 15cm x 25cm ultra clea low iron nano tall with floating bottom.
Light: random plant light from local store.
Substrate: random top fin black pebble gravel that came in a bag with a marketplace tank setup.
Pump: random pump from my dad’s garage from one of my brothers super old tanks.
Plumbing: extra black RO 1/4” tubing and quick connect fittings from a reptile mist kit (for another project).
I started by building the frame with divider panels. There are two ledges that propped up the hardscape, and the whole frame was draped and buffered with 3d spacer mesh (Epiweb) to retain moisture and humidity near the top of the scape without needing a lid. The mesh also helps keep the wood in contact with water, and aids establishing moss.
3d spacer mesh:
Back filter installed:
And the dry fitment test. Had to file down the rock on both sides so it fit without being forced in there. I constructed it this way so the whole scape could be pulled out at once if I needed to reset it, or just the pump if it needed to be serviced. More 3d spacer mesh was wedged in all the crevices for additional wicking.
Topped up and testing:
Additional hardscape up top to help hide all the outflows, and provide space for the finishing flora (maybe some air plants and/or orchids).
4 Replies
·
628 views


Staff member
I Donated 2026
Founding Member
There is A LOT of history to this that is tied to some of the biggest names in the hobby's past. I tried to get them into the USA with Clause Christensen back in the 90s but no-go.
This would be big news for US hobbyists as availability of healthy, aquarium-ready plants is THE limiting factor in expanding the hobby in the USA.
21 Replies
·
519 views
Staff member
I Donated 2026
Founding Member

This is A River... Somewhere, the amazing IAPLC 2025 Grand Prize winning work of Josh Sim. I think this is a wonderful aquascape to use to start the Learning From Series. I hope you would agree.
The Learning From Series
I have no talent when it comes to aquascaping. If I'm honest, this is also true for almost all forms of art.... So, I am in awe of people like Josh, our friend @Jeff Miotke and @Naturescapes_Rocco, along with many others that we are privileged to count among our community. I am also so thankful that they have the talent and choose to share it with the rest of us.
The reality is that although I can't create these works of art, I can certainly appreciate them. My talents lie more in keen observation, critical thinking and curiosity. You know, stuff that will never make me a millionaire but that do come in handy when you're trying to learn something new.
As I'm in the back nine of life, I've decided that I want to take some time to appreciate and learn from aquascaping artists such as Josh. Thus, the idea for this series was born. I'm calling it the Learning From Series because that's exactly what it is. And, I'll be documenting my thought process and learnings here as a series of articles.
We are a community and sharing is part of the fun. So, I do hope you jump in and participate even if it's to tell me that I've completely missed something important. Maybe we learn together.
Finally, given that I have a day job (unfortunately, it's quite inconvenient when I'm trying to spend most of my time here), these articles will likely come in pieces. My MO is deconstructing the aquascape so that I can understand it. I'm a savor the wine type of guy rather than chug the beer.
Initial impressions of A River... Somewhere
This aquascape is multifaceted. It hits me with a lot of first impressions.
It's so real, almost biotopy. Yet, it is perfect. A lot to digest. For now though, dinner is calling. More tomorrow.
-- Update September 18, 2026
Observations continued
Amano used to say that the plants were the paint in an aquascape. I usually try to step back from the details and look at the forest, if you will. I focus on just color. This aquascape is very strongly skewed towards green. The green mostly rests on dark wood tones and black shades.
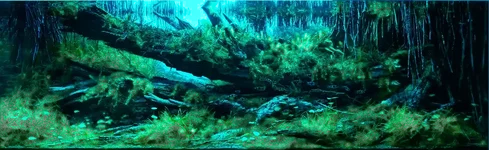
In this image above, I've blurred slightly and then punched up the greens to make them more obvious. Green is about 75% of the color, would you say?
This makes me think about focal point. Usually we are told to have a focal point in our aquascapes and this should be made quite obvious through the use of a pop of color (usually red) and/or different leaf texture or style of plant. Do you see that here?
Also, thinking compositionally again, the use of a "vanishing point" is also highly recommended. Do you see one here? I'm struggling to find it. There is certainly depth here making it seem like the river continues well beyond this image. But, how does Josh accomplish this without an obvious vanishing point?
I think his expert use of very clear foreground items versus smaller, blurred background items gives the impression of depth without needing a vanish point. This tricks our minds into thinking the things in the background a far away. This, it seems, is where details matter.
Another observation is just how natural this looks. I can truly believe that this could be a scene in "some river... somewhere." The downed tree rests very naturally and appears naturally weathered. Has a natural patina created by skillful trimming of moss and plants. Notice that the moss is not an even carpet of green. It's different shades and textures.
Nature doesn't create golf courses of green. Nature is wabi-sabi and does not favor only one species.
The hanging roots on either side also pull on my attention and constantly fight to pull me away from the center of the aquascape. There are more on the right side than on the left. Why is that? I think it will be more obvious when we analyze the composition.
Finally, what would you say is more dominant in this aquascape, if anything? Is this more plant-focused or hardscape-focused?
I will have more thoughts as I continue to deconstruct this wonderful aquascape in my mind. Again, this is really an intentional stream of consciousness, folks. And please don't misinterpret my breakdown as any sort of criticism. This is how I learn, by peeling the onion one layer at a time.
More tomorrow. Composition is next.
4 Replies
·
131 views
Supporting
I Donated 2026
Rockstar
Well...let's spend more money! I had thought about attending Aquashella - Chicago a few months ago but decided to pass this year. When I was thinking about it, they still didn't have the specific VIP guest list posted. Out of curiosity, I checked today and to my surprise, the man himself, Yusuke Homma, will be presenting the masterclass on Saturday. I can't pass that up when it's only an 8 hour drive. Ticket purchased, room booked. Anyone else attending?
1 Replies
·
55 views
Staff member
I Donated 2026
Founding Member
This is the future home for the announcements when someone obtains an achievement badge. Let the games begin!
2043 Replies
·
68028 views
Both tanks contain a lot of bucephalandra stems I have recently melted by feeding my caridina tanks with mulberry leaves. I have no idea what the heck happened but all buces melted in those tanks heavily over 3 days with every other plant + shrimp being fine. Don't wanna risk the plants dying so I'm throwing them back into high tech for a few months to recover.
Set Up:
Both tanks uses heavy co2 misting
Horticulture LED lights (dimmed, so probably 25-30 watts?)
Will steadily increase light weekly if I see no issues, max is 40 watts.
Dual sponge filters. (Air bubbles help prevent co2 gassing, also seems to really help stabilize tank, so less algae)
1 Internal filter with an atomizer for misting.
Regime:
All tanks get a 30-50% water change, twice per week.
Micros dosed daily (unless I forget, which happens fairly often.)
Macros Front Loaded and only in new incoming water.
6 Gallon bucket water change:
~350tds (Using seachem equilibrium remineralizer)
~22ppm KNO3, using KNO3 + KH2PO4
~40-50 ppm Potassium due to remineralizer
~4-5GH
Buce Lottery Colors
Lots of buces, various names, collected over the years. A lot of them were ultra rare and I cannot buy them anymore. Most of the ultra rare I probably accidentally killed from trying to grow them in a "no filter, no co2" style tank. Either way, not much color in low tech, will see what lottery colors we pull once they get going with better colors in higher lights + co2.
Both tanks are planted tightly front to back with bucephalandra. Kinda hard to see it all with moss blocking the way, but my view will be your view.
Random Mosses
Some mosses I've collected as well, honestly I grow a lot of them free floating so they kinda look the same. We will find out how they look after I attach them to something.
15 Gallon, very aged sand + pebble tank.
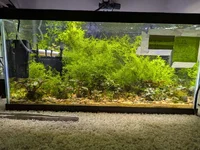
20 Gallon long, aged aquasoil I pulled from an existing caridina tank.

Wanted to take some macro shots, but does anyone know how to take an angle show on the glass without distortion? I have a DSLR long tube lens that works under water but color rendition is really bad.
Why so much moss?
Mostly to help stabilize the tank and to reduce light bleed. Less surface for algae to grow.
Set Up:
Both tanks uses heavy co2 misting
Horticulture LED lights (dimmed, so probably 25-30 watts?)
Will steadily increase light weekly if I see no issues, max is 40 watts.
Dual sponge filters. (Air bubbles help prevent co2 gassing, also seems to really help stabilize tank, so less algae)
1 Internal filter with an atomizer for misting.
Regime:
All tanks get a 30-50% water change, twice per week.
Micros dosed daily (unless I forget, which happens fairly often.)
Macros Front Loaded and only in new incoming water.
6 Gallon bucket water change:
~350tds (Using seachem equilibrium remineralizer)
~22ppm KNO3, using KNO3 + KH2PO4
~40-50 ppm Potassium due to remineralizer
~4-5GH
Buce Lottery Colors
Lots of buces, various names, collected over the years. A lot of them were ultra rare and I cannot buy them anymore. Most of the ultra rare I probably accidentally killed from trying to grow them in a "no filter, no co2" style tank. Either way, not much color in low tech, will see what lottery colors we pull once they get going with better colors in higher lights + co2.
Both tanks are planted tightly front to back with bucephalandra. Kinda hard to see it all with moss blocking the way, but my view will be your view.
Random Mosses
Some mosses I've collected as well, honestly I grow a lot of them free floating so they kinda look the same. We will find out how they look after I attach them to something.
15 Gallon, very aged sand + pebble tank.
20 Gallon long, aged aquasoil I pulled from an existing caridina tank.
Wanted to take some macro shots, but does anyone know how to take an angle show on the glass without distortion? I have a DSLR long tube lens that works under water but color rendition is really bad.
Why so much moss?
Mostly to help stabilize the tank and to reduce light bleed. Less surface for algae to grow.
19 Replies
·
1441 views